Call 1-888-670-1652
Spire CoreDB Connect Error (2002) Connection timed out
How To Edit And Modify Page Content
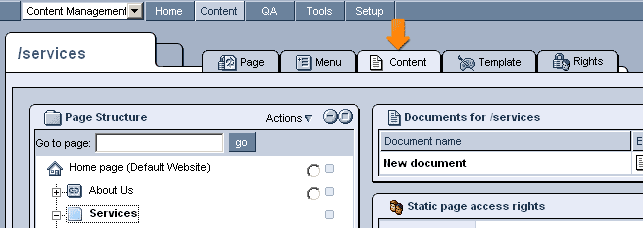
The "Content" tab is where you can edit and modify the content of your pages, and specify to whom and under what conditions the content should be displayed. In Order To Enter Content For Your Pages:1. In order to access the tab, login into your website's administration and click on the "Content Management" icon. This will take you to the Document Tree, where you can find and select the page you wish to add content to. (If the page does not yet exist, please see our section on how to create a new page). 2. Once you have selected the desired page from the Document Tree, click on the tab labeled "Content."
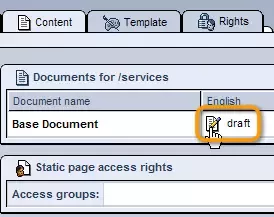
3. Within the page's "Content" tab, click on the "Edit" icon next to the document's name.
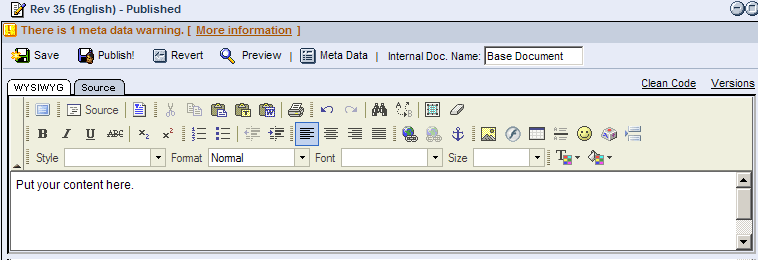
WYSIWYG Editor:The What You See Is What You Get (WYSIWIG) editor allows you to add new content to the site in a straightforward visual manner. With this easy-to-use edtior, you can manipulate the arrangement, size, and overall look of your website's content efficiently and without the uncertainty or worry of pages appearing differently from what you intended. What you see in the editing environment really is what will be displayed when the content is published. The WYSIWIG editor includes the following basic formatting features:
The editor provides you with many user-friendly tools to create and edit these various features of your site. By rolling over each icon in the toolbar (displayed below), you can find brief descriptions of what each tool does. In most cases, however, it is best to avoid using the tools unless absolutely necessary. Whenever possible, we recommend simply using plain text and the headings found in the "Format" drop-down menu.
In order to learn more about how to edit your web pages with the WYSIWYG and Source editors, please see our "Content Editors" section. Static & Dynamic Page Content Differences:Saving and Publishing Pages
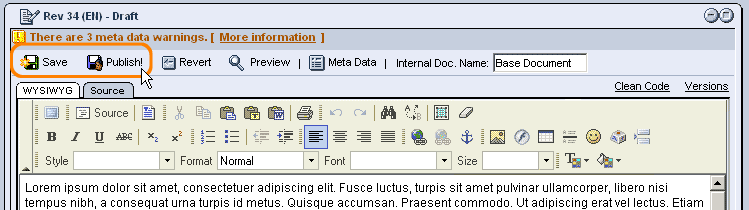
Once you have edited the content of a particular page using either of the content editors, there are a number of options available to you. The following section will describe these options and the various cases in which to use them. Save:The first, perhaps most important, of these options, is "Save." It is important that you get in the habit of saving your documents very often, as if you wait too long, you may be logged out of the administration site and, thus, lose some of your most recent changes. In order to save a document as a draft, without publishing it, simply click on the following icon located on the upper left-hand corner of the content editors' window:
Publish:Another one of the most important icons available to you when using the content editors is the "Publish" icon:
When clicked on, the changes you have made to the current page's content will be applied to the website, and this most recent revision will become the new live page displayed to users on the site. Revert:In case you decide to get rid of the changes you have made to a page, rather than save and/or apply them to the website, another option is available. This option can be employed by clicking on the "Revert" icon:
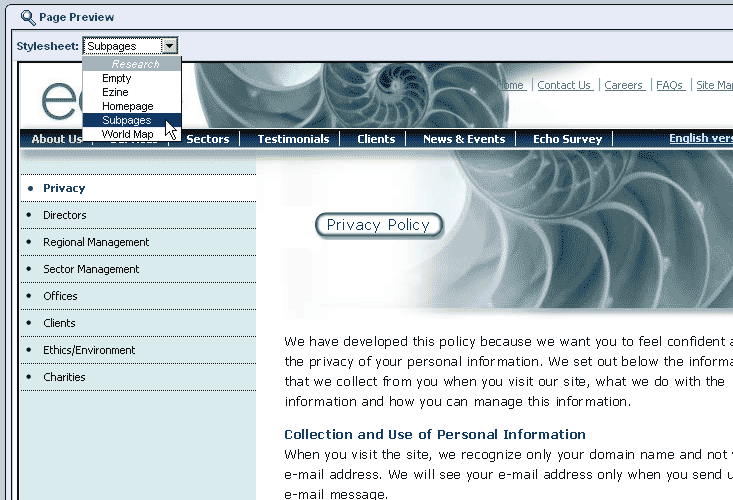
Page Preview:In order to view a preview of the page without having to save or publish the current document, you can click on the next icon in the content editors' toolbar:
By selecting the "Preview" icon, you will be taken to a screen below the content editing window, where you will be presented with a preview of the page exactly as it will appear on the website once published. One of the great features of the "Page Preview" window, is that it also allows you to modify and select templates with the "Stylesheet" drop-down menu (pictured below), in order to see how the content will actually look on a page and to ensure that it fits within the desired template's layout.
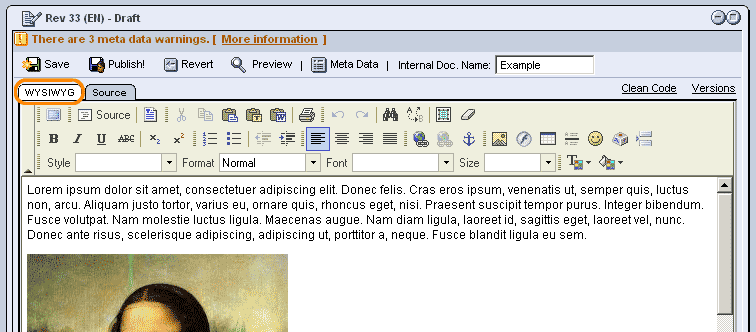
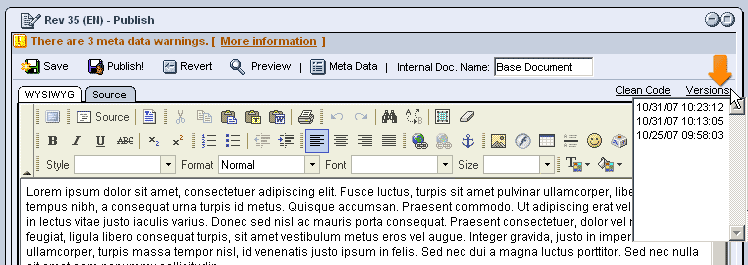
Viewing Previous Versions:When working in the content editors, you can always access previously saved or published versions of the document you are currently editing, if, for example, you change your mind about more recent revisions and wish to revert to a previous version of the page. Simply click on the desired version within the drop-down menu labeled "Versions" in the upper right-hand corner of the content editor window (as pictured below). You can then proceed to edit this version of the document and publish it. In case you change your mind again, or in case you simply wish to view an older version of the document for comparison, you can always use the drop-down menu again to move to other saved versions.
|
Aspiresoft 2017 © All Rights Reserved. Privacy Policy