Call 1-888-670-1652
Spire CoreDB Connect Error (2002) Connection timed out
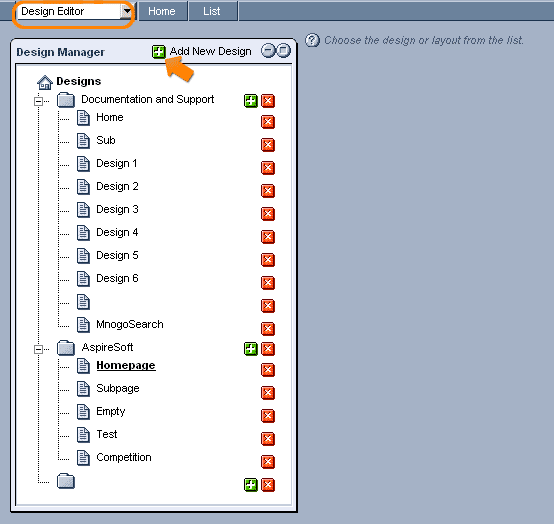
DesignEditor / TemplatesThe system's highly flexible Design Editor allows you to create design templates to be used for your entire website, making your job easier and more efficient as you are spared the effort of designing each page individually. In addition to its time-saving qualities, the Design Editor also helps to ensure that your site maintains a uniform, professional, and consistent appearance with its capacity to create an unlimited number of customized templates under each design.
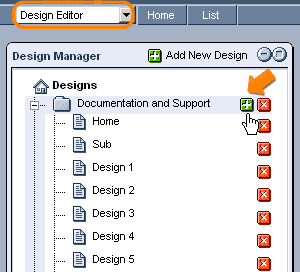
Creating Designs:After creating the desired designs for your website and converting them into HTML, the first step to begin customizing your site's appearance with the Design Editor is to create a new design, which is essentially a collection of individual templates that are linked by common basic style elements and work together to form the basis of a site's overall appearance or look. A site might even employ more than one design (collection of templates) in case it involves two entirely different looks, perhaps one for the public areas of the site and one for the private members-only sections. In order to create a new design to act as a container for a group of templates, click on the "New Design" icon in the upper right-hand corner of the "Design Manager" table.
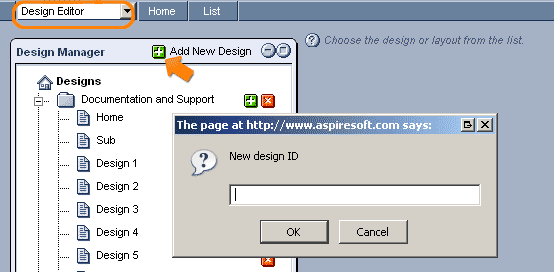
In the window that appears, simply enter a name for the design and click "OK." The name will only be used for your personal reference and will never appear anywhere on the public site, so feel free to enter whatever name will best help you to identify and distinguish the design from others.
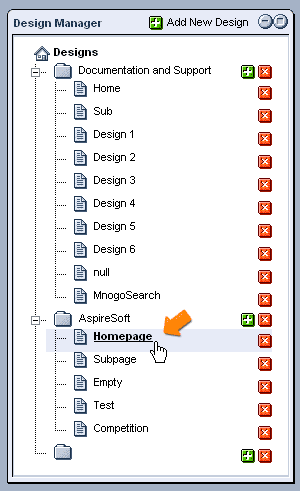
Once clicked, the new design will appear at the base level of the "Design Manager" hierarchy.
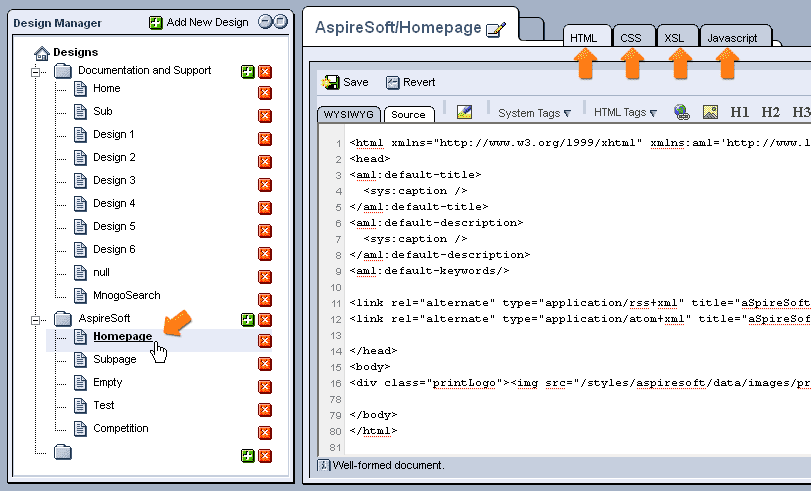
From here, the next step is to click on the design's name in order to begin creating the global aspects of your site's design (such as the appearance of links and background colors) that you would like to be carried over and apply to every page within your website that uses the templates contained within the overarching design. Once clicked, you will be presented with three tabs: CSS, XSL, and Javascript. Simply enter the proper code into each of these tabs, all of which will be described in detail in the sections to come, and the settings specified will be applied to the entire website.
Creating Templates:After you have finished with the global attributes of your website, it is time to begin creating individual templates. Generally, a website will have at least two individual templates: one specifically for the homepage and at least one other for sub-pages. In order to create a new template, simply click on the "New Layout" icon within the row of the "Design Manager" hierarchy corresponding to the desired design.
In the window that appears, simply enter an appropriate name for the template and click "OK." Once again, this name will only be used for your personal reference and will not appear on the public site, so feel free to use whatever name best helps you to identify and distinguish the template from others. Once clicked, the new template should appear in the "Design Manager" hierarchy under the specified design.
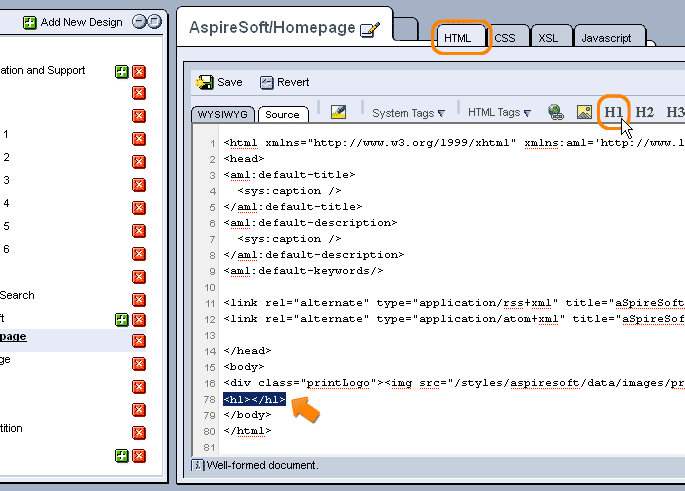
In order to begin creating the contents of the template, click on the template's name and you will be presented with a screen containing the same tabs as those used in designing the site's global aspects, with the notable addition of a fourth tab labeled "HTML."
It is in this "HTML" tab that you can insert all of the HTML code generated by the design that you will have already created in some external program. In order to add to this design and specify where you would like particular elements to appear, such as the page content and navigation menus, you can insert any number of system tags (described in detail in the "HTML" section to come) into the proper places within the pasted HTML code.
In addition to working with HTML, you can make use of the other three tabs (CSS, XSL, and Javascript) to include any special attributes not already specified within the global design that you would like to apply only to pages using this particular template. For more specific information on how to use each of the individual design tabs, please see the following sections: |
Aspiresoft 2017 © All Rights Reserved. Privacy Policy