Call 1-888-670-1652
Spire CoreDB Connect Error (2002) Connection timed out
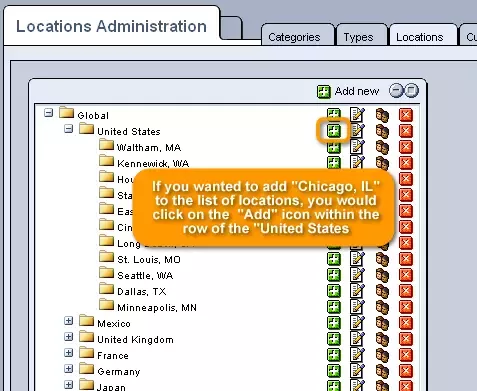
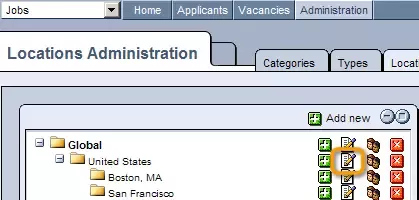
Job LocationsThe "Locations" section of the Jobs "Administration" allows you to create a customized hierarchy of locations used to specify where vacant positions within your company will be based. Creating New Locations:In order to add a new location to the list, you can click on the
For example, in the picture below, if you wanted to add "Chicago, IL" to the list of locations, you would click on the
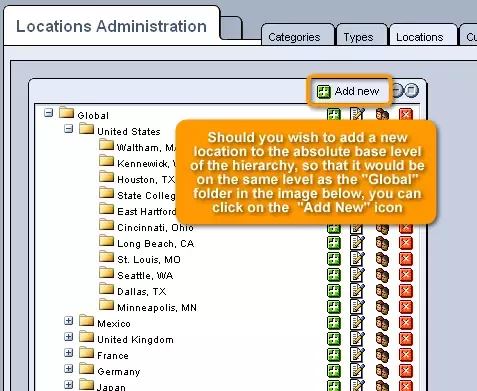
Should you wish to add a new location to the absolute base level of the hierarchy, so that it would be on the same level as the "Global" folder in the image below, you can click on the
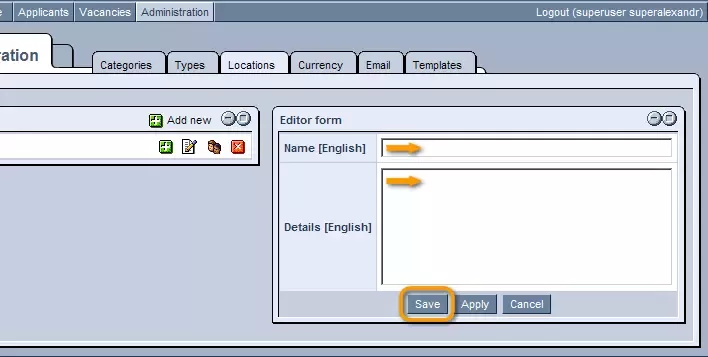
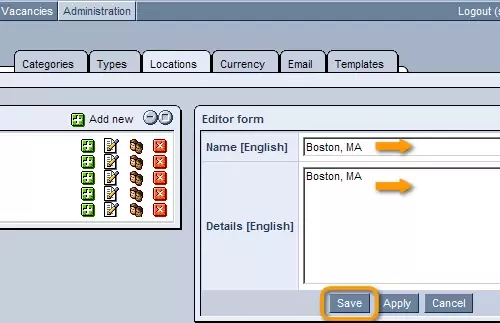
In any case, after clicking on the appropriate icon, you will be presented with a window in which you can enter a name for the new location, as well as a short description of this location's specific details.
When you are done, click "Save," and the location will be added to the hierarchy in the selected position.
Modifying Locations:If at some point you would like to modify the details of a particular location, just click on the
In the window that appears, you can alter the location's name and description as you wish, before clicking on "Save" in order to update the system with the changes made.
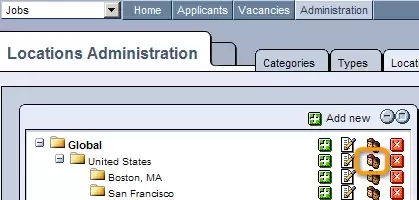
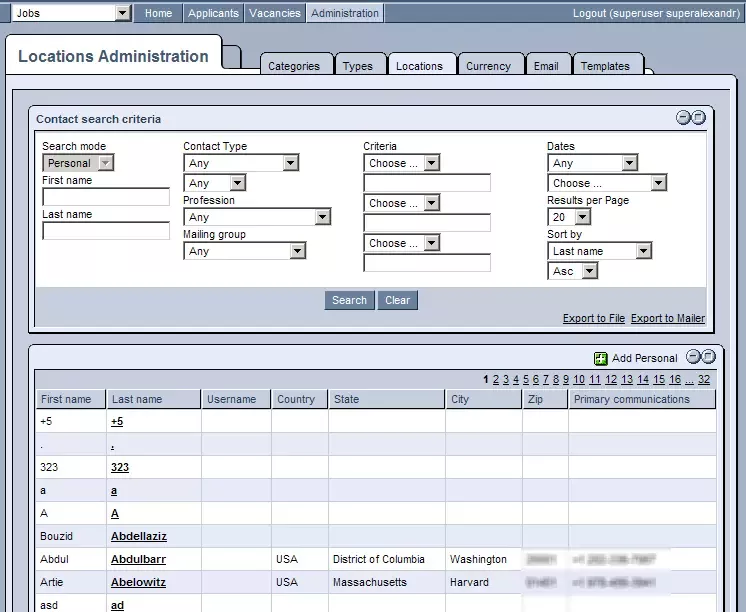
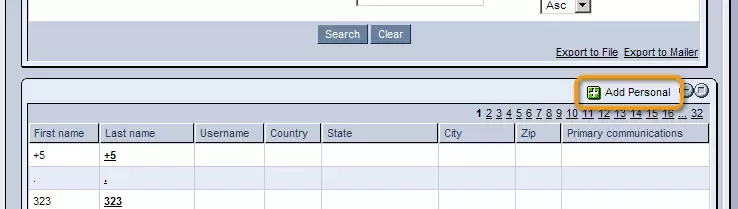
Adding/Modifying Contact Persons:Another possibility in working with a particular location is to add contact persons, to whom applicants will be directed when interested in a position based in the location in question. In order to do so, simply click on the
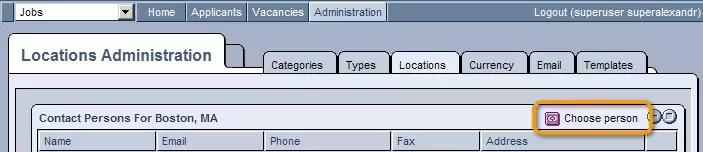
You will then be presented with the "Contact Persons" window (displayed below), where you can click on the
Once clicked, you will be displayed with a list of contacts existing within your CRM system, which can be narrowed down using the "Contact Search Criteria" form at the top of the window.
Once you have located the desired contact, click on his/her name in order to add him/her to the list of contact persons.
In case the desired contact does not yet have a profile within the CRM system, you will also have the opportunity to create one for him/her by clicking on the
In either case, once you have selected the desired contact(s), you can click on "Finish Selection" at the bottom of the "Contact Persons" window, and the contact(s) will be attached to the location in question. Should you wish to remove a particular contact, just check the box located at the far right of his/her row of the "Contact Persons" table, and click on the "Remove Selected" button at the bottom of the screen. After this, he/she will no longer be listed as a contact person for this location.
Removing Locations:Finally, should you wish to get rid of a location entirely, you can click on the
After this, it will no longer appear as an option in the forms used to create and modify vacancies. |


Aspiresoft 2017 © All Rights Reserved. Privacy Policy