The "Email" section of the Jobs "Administration" allows you to create customized templates that will help facilitate efficient and personalized correspondence with your company's applicants.
Applicant Email:
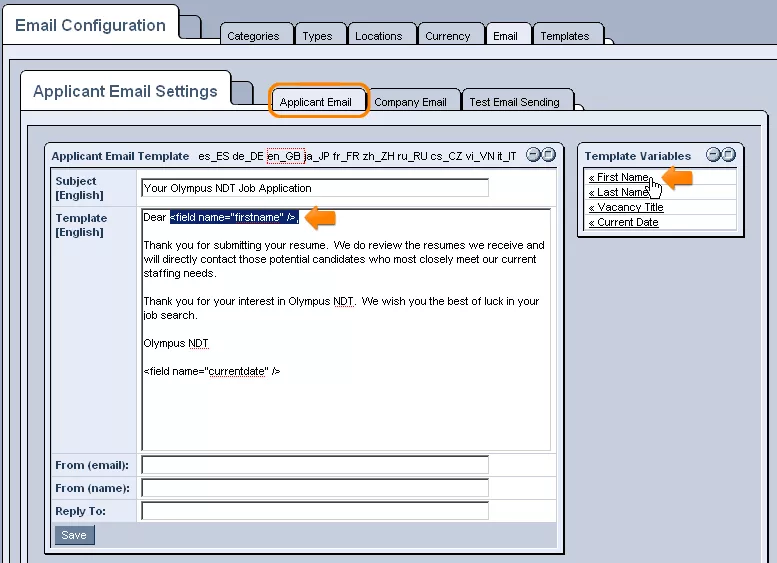
The first tab within the "Email" section, labeled "Applicant Email," allows you to create a template for emails automatically sent to applicants upon the submission of their applications.
In order to begin, enter an appropriate heading that you would like to be displayed in the "Subject" field of the emails when sent to applicants.
You can then enter the body of the email as you would like it to appear, making use of the "Template Variables" on the right-hand side of the screen in order to insert variables that will automatically be replaced with the details of the applicant to whom the email is being sent.
Finally, you can specify a name and email address from which you would like the email to appear as having been sent, as well as an email address to which replies to this email should be sent.
Once you are done, click "Save," and the template will henceforth be used in all emails sent to applicants confirming the receipt of their applications.
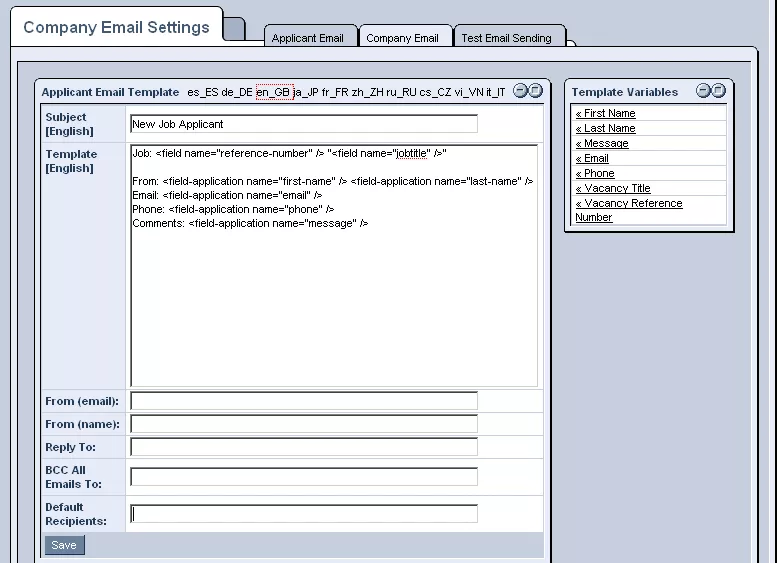
The second tab within the "Email" section, labeled "Company Email," allows you to create a template for the emails sent to your company informing you that a new application has been received for one of the vacancies posted on your website.
In order to begin, enter an appropriate heading that you would like to be displayed in the "Subject" field whenever emails of this type are received.
You can then enter the body of the email as you would like it to appear, making use of the "Template Variables" on the right-hand side of the screen to insert variables that will automatically be replaced with the details of the applicant in question.
After completing the "Template" section, you can go on to enter a name and email address from which you would like all emails of this type to appear as having been sent, as well as an email address to which you would like all replies to these emails be directed.
Finally, you can specify email addresses that you would like to receive blind carbon-copies of these emails, as well as email addresses for those people within your company that you would like these emails to always be sent to .
Once you are done, click "Save," and the template will henceforth be used in all emails of this type.
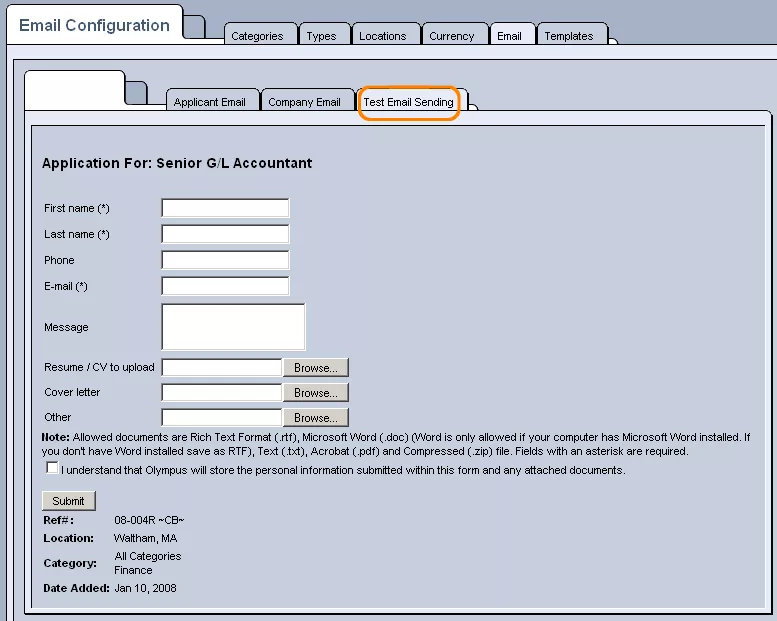
Test Email Sending:
The third tab, labeled "Test Email Sending," allows you to submit a test application in order to see if the emails designed in the previous two tabs are appropriately generated upon the application's submission.
In order to carry out the test, fill out the provided fields as desired with the details of the "applicant," making sure to enter a full name for the variables to be filled in with, and a valid email address for the "Applicant Email" to be sent to.
Once you have entered the desired information, make sure to check the box at the bottom of the form stating "I understand that...," and click "Submit."
Once submitted, you should check to see if the "Applicant Email" was successfully delivered to the email address specified in the form and correctly filled in with the details of the applicant.
You should also check to see if the "Company Email" was successfully received (with all of the correct information) by the email address(es) specified in the
"Company Email" tab.
Once you have confirmed that the emails were successfully generated and received, you are good to go and ready to begin receiving applications.