Call 1-888-670-1652
Spire CoreDB Connect Error (2002) Connection timed out
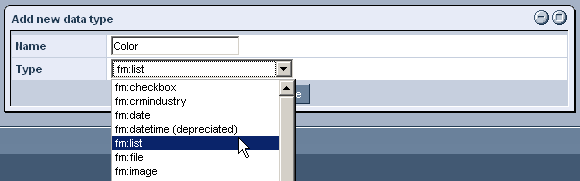
List (multi-select)Data types specified as "List (multi-select)" allow the user to choose multiple values from a list of pre-defined options. Apart from the one difference that, once created, users will be able to select multiple options, the actual process for creating "List (multi-select)" data types is exactly the same as the process for creating single-select lists. Creating Multi-Select Lists:After entering the desired name for the data type (such as "Color," in the image below), and selecting "fm:list (multi-select)" from the "Type" drop-down menu, click "Save."
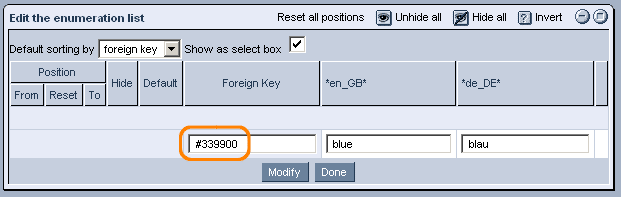
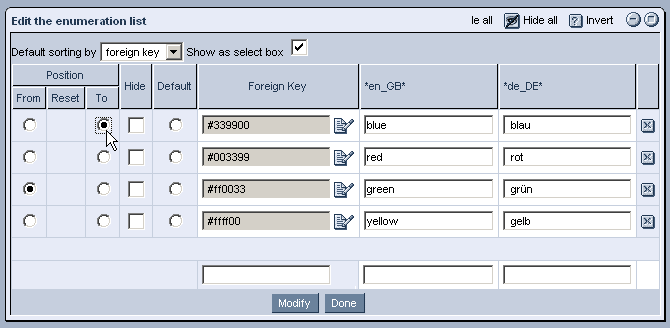
Creating Options: In the next window that appears, labeled "Edit the Enumeration List," you can create all of the options that you would like to be included in the list. By default, the list, once created, will appear as a drop-down menu. If you would prefer for the list to make use of radio buttons instead, simply uncheck the check-box at the top of the window labeled "Show as Select Box." In order to enter the options that you would like to be included in the list, simply enter the text as you would like it to appear into the empty text-boxes for each of the languages that your site supports. These user-friendly, language-dependent items will be displayed based on the default or preferred language of users' browsers. The data entered into the "Foreign Key" field, however, will be what is used to store and organize the options within the database. Should you wish for the order in which the options are displayed within the list to be based on the actual values entered for the individual languages, you can change the "Default Sorting By" drop-down menu at the top of the window to display "value" instead of "foreign key."
Creating Additional Options: In order to add additional options to the list, as at first you will only be presented with one row, simply click on the "Modify" button at the bottom of the screen. Once clicked, an additional row will appear, in which you can enter the details of the new option. Modifying the List Order: Should you wish to modify the order in which individual options are displayed within the list, this can be done with ease as well. Simply select the button in the "From" column of the desired option's row, and then select the button in the "To" column of the row that you would like the option to be moved to. Hiding Options: Should you ever wish to hide options so that they will not be displayed in the list, you can either click within the "Hide" box in the row of the desired option(s), or select "Hide All" in the upper-right hand corner of the window, in which case none of the options will be displayed. In order to restore options, either uncheck the "Hide" box in the row of the affected option(s), or select "Unhide All" in the upper right-hand corner of the window.
Modifying/Removing Options: In case you would ever like to modify the "Foreign Key" assigned to a particular option, just click on the
Similarly, if you would like to remove an option entirely, you can click on the
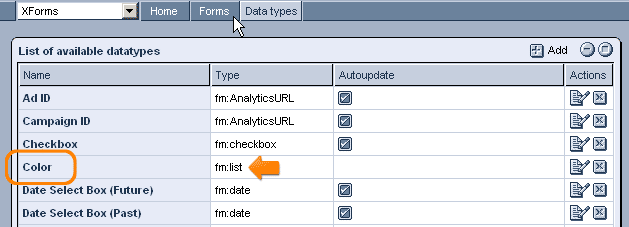
Once you are done enumerating the options that you would like to be displayed within the list, simply click "Done" at the bottom of the screen, and the data type will be added to the "List of Available Datatypes."
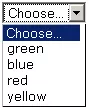
In the end, the graphical output of the "List (multi-select)" data type will look something like one of the images below:
|

Aspiresoft 2017 © All Rights Reserved. Privacy Policy