Call 1-888-670-1652
Spire CoreDB Connect Error (2002) Connection timed out
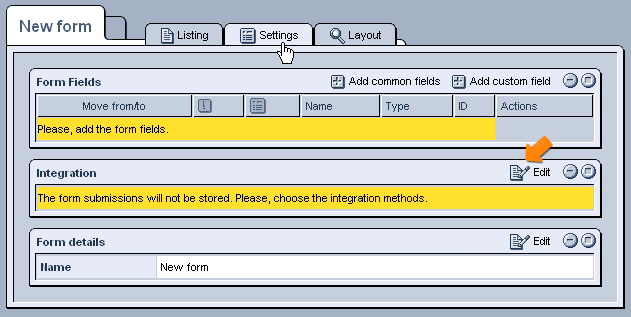
How To Use the XForm Resubmitter OptionIn order to use the data from a submitted form to complete and submit some other form, you must first access the original form's "Settings" tab within the "XForms" administration.
From here, you can click on the
In order to specify the details of the resubmission, click on the
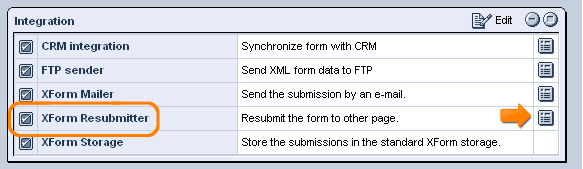
In the window that appears, click on the
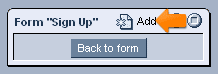
Click on "New Resubmit," and various windows will appear on the right-hand side of the screen, in which you can outline the desired settings for the resubmission.
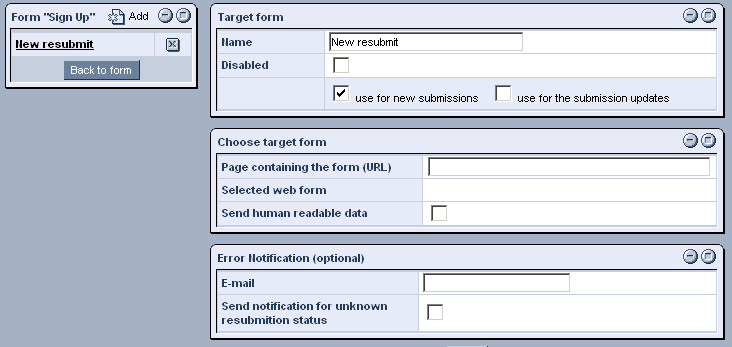
General Resubmission Details:The first step in specifying the details of the resubmission is to assign it a new name, so it is easy to identify it in the future. You can then also specify when you would like resubmissions to be made (when new form submissions are made and/or when existing submissions are updated) by selecting the appropriate box(es). And should you at some point wish to stop the resubmissions, without getting rid of the option entirely, you can disable it by simply checking the "Disabled" box. Whenever you wish to start using the resubmit feature again, you can simply uncheck the box. In the "Choose Target Form" window, you can enter the URL of the page on which the form that you would like the data resubmitted to is located. Should there be more than one form on that page, a drop-down menu will appear in the "Selected Web Form" field, where you can select the actual form that you would like the data to be entered into. And in case the target form is not compatible with the system ID's used in your original form, you can check the "Send Human Readable Data" box Field Mapping:In the "Field Mapping" window, which will appear after specifying the target form, you will be able to view a list of all of the fields that exist within the target form. !NEED SCREENSHOT OF FIELD MAPPING WINDOW In order to determine if data from your original form should be used to fill out particular fields in the new form, you can check or uncheck each of the individual fields within this list. You can then use the drop-down menus located at the far right of each of the rows to select which field's data from the original form should be inserted into each of the fields within the target form. For your benefit, you can hold your cursor over the
In case there are multiple "Submit" buttons on the target form, they will all be listed at the bottom of the window, so that you can select the appropriate one that you would like to be used in the simulated submissions. Determining Status:In the "Determining the Resubmission Status" window, you can enter strings of text that are displayed whenever the target form is successfully or unsuccessfully submitted, so that the system will know whether or not the resubmission worked. !NEED SCREENSHOT OF RESUBMISSION STATUS WINDOW If you choose to fill out these fields, you can also specify an email address in the next window to which error messages will be sent whenever a resubmission generates the specified string of text that signals an unsuccessful resubmission. By checking the appropriate box, you can even choose to have messages sent to this email when the status of the resubmission simply cannot be confirmed. Once you have finished specifying the desired settings, click "Save" at the bottom of the screen, and, henceforth, whenever the original form in question is completed, the data will be used to fill out and submit the second form that you have specified within this section. |
Aspiresoft 2017 © All Rights Reserved. Privacy Policy