Call 1-888-670-1652
Spire CoreDB Connect Error (2002) Connection timed out
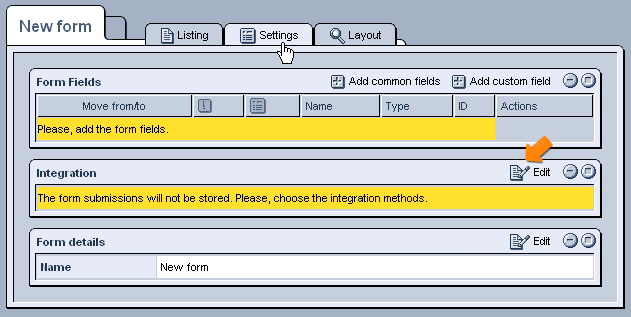
How To Email Data From Submitted FormsIn order to have completed forms sent to a specified email address, you must first access the desired form's "Settings" tab within the "XForms" administration.
From here, you can click on the
In order to specify the details about when and where to send the emails, you can click on the
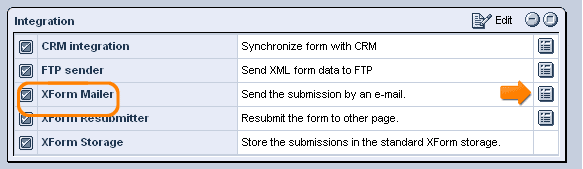
Once this is done, select the
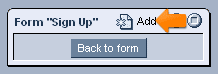
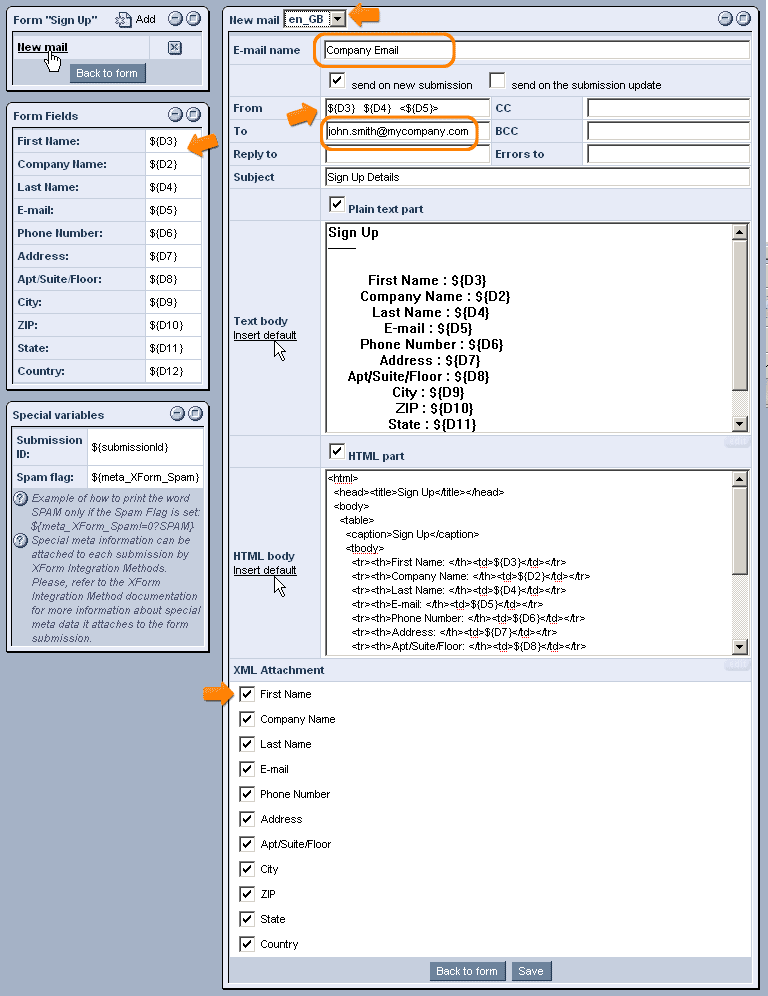
This will cause a new row to appear in the table, labeled "New Mail." Email Settings:In order to specify the settings associated with this particular mailing, click on its name, and you will be presented with a window like the one pictured below.
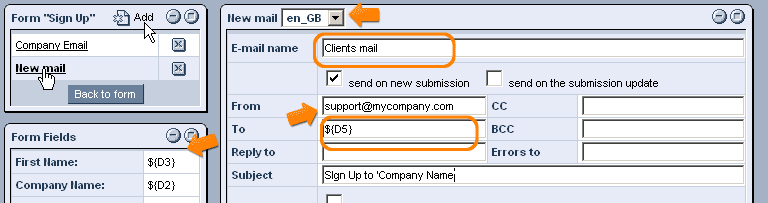
Here, you can enter a new name for the email, so that it is easy to identify in the future, as well as specify when you would like the email to be sent (when new submissions are made and/or when existing submissions are updated) by checking the appropriate box(es). You can then specify the email address to which you would like the emails be sent, as well as the name/email address that you would like the emails to appear as having been sent from (this can be filled in with the details of the applicant in question, using the variables listed in the "Form Fields" table, as in the image below). You will also have the option of entering email addresses to which copies of the email, replies, and errors should be sent. Creating Content:Once the email addresses are specified, you can begin to outline the email's content. The first step is to enter the text that you would like to appear in the email's "Subject" line. You can then select to create the body of the email in plain text and/or HTML by checking the appropriate box(es). In the windows that appear, you can either enter the desired content by hand (making use of the variables on the left-hand side of the screen) or else select the "Insert Default" button, which will insert a basic list of all of the fields within your form. Finally, before clicking "Save," you can choose to have XML files of the data entered into certain fields be sent as well, by simply checking the boxes of the desired fields at the bottom of the screen.
|
Aspiresoft 2017 © All Rights Reserved. Privacy Policy