1. In order to add a task, simply click on the
 "Add" icon located next to the "Tasks" option in the "PMS" tab.
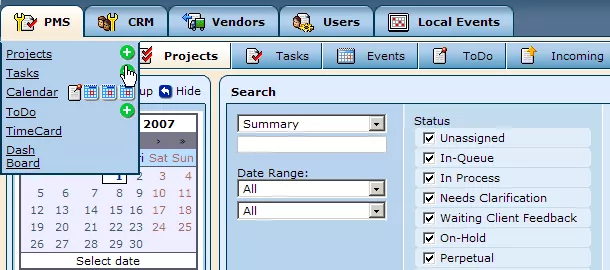
2. In the "Edit Task" window which appears, select the type of task you wish to add from the provided list (in most cases, "General Task" is sufficient).
3. After specifying the task type, you will be presented with a number of fields to fill in with the task's details.
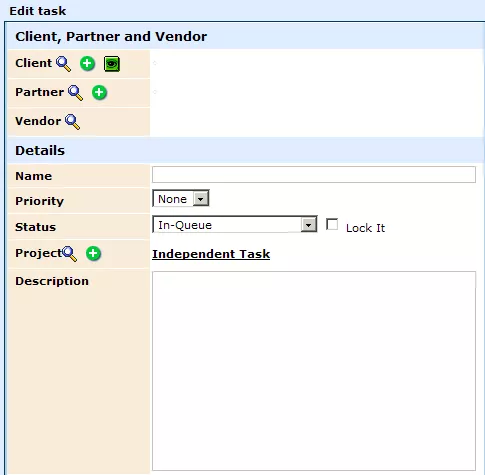
Client, Partner, and Vendor:
For all 3 of the fields within this section, you can click on the following icon in order to select the company or department you would like to connect the task to:
 .
.
Within the search window that appears, simply use the provided fields to specify some details of the sought after company or contact and then click on "Search." When presented with the results list of companies/contacts matching your specified criteria, check the box next to the desired name and then click on the "Choose Selected" button at the bottom of the
window.

Task Name:
Within this field, simply type in an appropriate name for your task. When composing your task's name though, try to keep it as short as possible, as you will have the opportunity to specify further information later within the task's "Description" field.
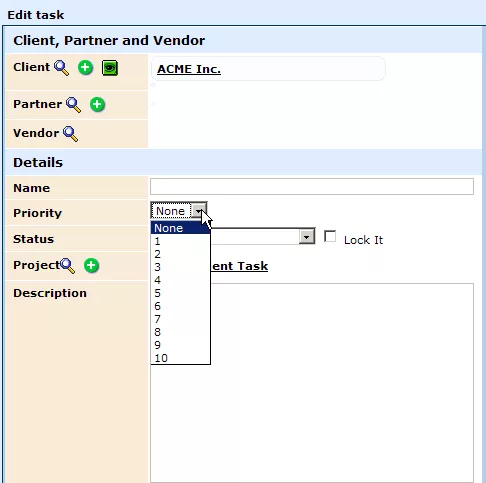
Priority:
In this field, you can specify the task's priority by selecting a number appropriate for its urgency from the drop-down menu (10 being the highest priority and 1 being the lowest).
Status:
Choose an appropriate status for your task from the "Status" drop-down menu. In most cases, the "In-Queue" option should be used, as it will place the task in a queue of tasks to be completed by the employee(s) it is assigned to (when a task is completed, the PMS will automatically move to the next assigned task in line for the particular employee to work on).
Other common possibilities include "In Process," when you would like for the assigned employee(s) to begin work on the project immediately, rather than have the task wait in a queue, and "Perpetual," when the project is more general and ongoing in nature, and thus does not fit well within a set time-table or queue of tasks (it can be worked on at any time, even while other tasks in queue are active).
"Quality Control" is generally selected when the task has been completed by the designated employee(s), so that it can be reviewed by the task's leader to ensure it has been done well. Once checked for quality, the status can then be changed to "Completed."
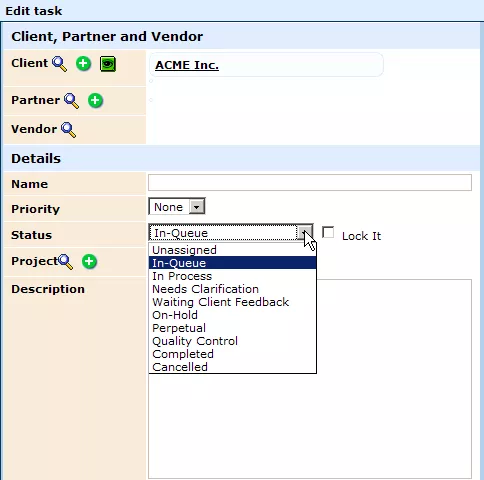
Project:
By default, this field will be set to "Independent Task." However, in order to connect the task to some larger, over-arching project that exists within the system, simply click on the magnifying glass icon within the field (you can also create a new project to place the task under by clicking on the
"Add" icon).
After clicking on the icon, you will be presented with a window labeled "Select Project/Task," which you can use to search for the desired project. Simply type the project's name (the first few letters of it might even suffice) into the provided text box, and hit "Enter." You can then select the project from the results list that appears.

Description:
Within this field, you will have the opportunity to write a more detailed description of the task. Keep in mind, though, that the space within this field is limited. If you wish to write more, you can make use of the
"Notes" section , which is able to accomodate larger texts, once the task has been created.
Choose Leader:
Within this field, you can specify the project's leader by selecting the desired user from the drop-down menu. (For information on how to create and modify the list of employees found here, please see our section on
PMS users).
Assigned To:
Select the employee(s) you wish to assign the task to by clicking on their name(s) within the provided list (using the "Ctrl" key for multiple selection). (For information on how to create and modify the list of employees, please see our section on
PMS users).
Start Date:
By default, the box within this field, labeled "Open," will be selected, signifying that the start date will be left open. In order to specify a particular start date, simply click within the box in order to uncheck it, and select the desired day, month, and year from the provided calendar. If you wish, you can specify a particular time to start the task as well.
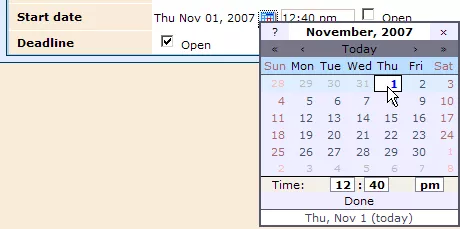
Deadline:
As with the "Start Date" field described above, by default, the box within this field, labeled "Open," will be selected, signifying that the deadline for the task's completion will be left open. In order to specify a particular date for the task's deadline, simply click within the box in order to uncheck it, and then select the desired day, month, and year from the provided calendar. If desired, you can also enter a particular time for the deadline.
4. After completing all of the relevant fields, you can specify who will receive notifications about the task's creation. By default, notifications will be sent to the leader of the task and all assigned users. If for any reason you wish to limit the notification recipients, however, you can select either of the 2 options located at the bottom of the screen: "Confirm notifications before sending" and "Do not send any notifications." For more information on these options
and on notifications in general, please see our
"Notifications" section.
5. Once you have specified the notification settings as desired, simply click on the "Save" button, and the task's creation will be complete. If you would like to continue working with the task and keep the task's "Edit" window open, click "Apply" instead of "Save." This way, the information will still be saved, and you will have the opportunity to add files and notes without going through the process of
searching for the task within the system.