Call 1-888-670-1652
Spire CoreDB Connect Error (2002) Connection timed out
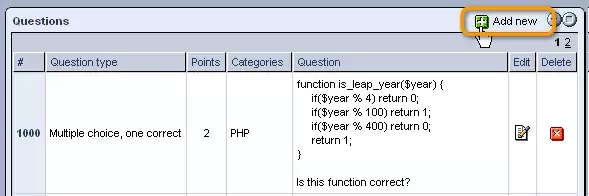
Quiz QuestionsQuestions:The "Questions" tab contains a list of all questions from all of the tests you have created.
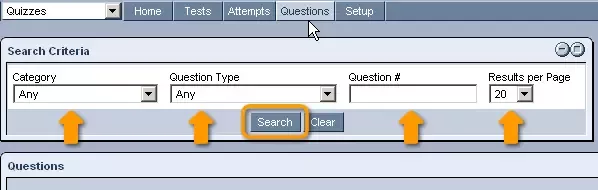
Searching for Questions:In order to locate a particular question, you can complete the "Search Criteria" form at the top of the screen with its details, and click "Search."
The "Questions" table below will be updated to display only those questions which meet the specified criteria.
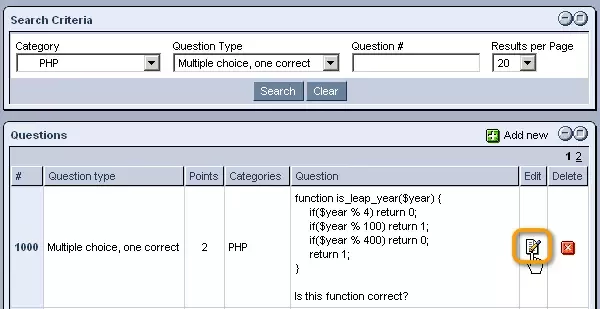
Editing Questions:Should you wish to edit any of the questions, simply click on the
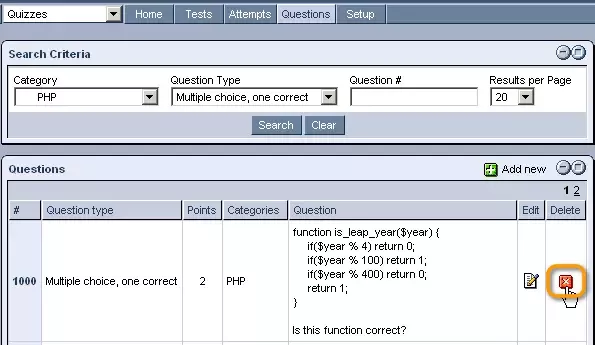
In the window that appears, modify the question's details as you wish and click "Save." Deleting Questions:If you would like to delete a question entirely, simply click on the
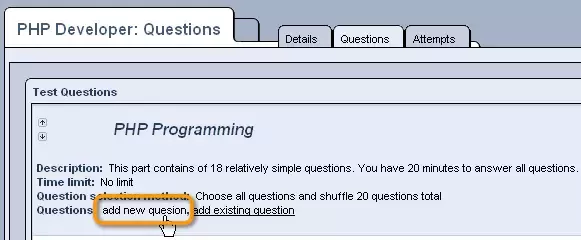
Creating New Questions:In order to create a new question to add to one of your tests, you can click on the
Once clicked, you will be presented with the "Add Question" form, which should be completed as follows: Question Type: Select the type of question you would like to create from the drop-down menu. Points: Select the number of points that you would like this question to be worth from the drop-down menu. Text: Enter the actual question as you would like it to appear on your test. Image: If you would like to include an image in your question, you should use the "Browse" button to locate and select it from within your computer. Answer (Type and Match (Auto) question type): Enter the correct answer to the question, which user's answers will be compared to. Answer Box Size (Type and Match (Manual) question type): Enter the number of rows that you would like to be available for users when entering their answer to the question. With questions of this type, you will have to later go through and determine if each user's answer is correct or not. Answer Options (Multiple Choice, One Correct): Select "Add Another Option," and, in the row that appears, enter the answer option as you would like it to appear on the test. In order to create additional options, simply select "Add Another Option" again. For whichever option is the correct answer, simply check the box in its row labeled "Correct." Answer Options (Multiple Choice, Many Correct): Select "Add Another Option," and, in the row that appears, enter the answer option as you would like it to appear on the test. In order to create additional options, simply select "Add Another Option" again. For every option that represents a correct answer, simply check the box in its row labeled "Correct." Once the form has been completed to your liking, click "Save" at the bottom of the screen.
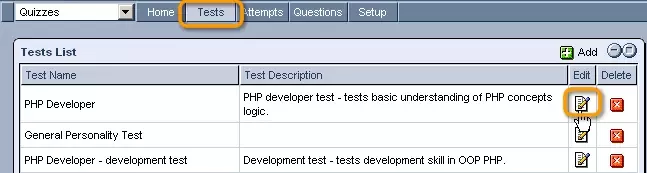
Once saved, your question will be ready to be assigned to a specific section within one of your tests. Test Sections:Test sections allow you to divide your tests into multiple parts with specific questions assigned to them Creating New Test Sections:In order to create new sections within your tests, you should select the "Tests" section from the top of the "Quizzes" administration screen, and click on the
In the window that appears, click on the test's "Questions" tab.
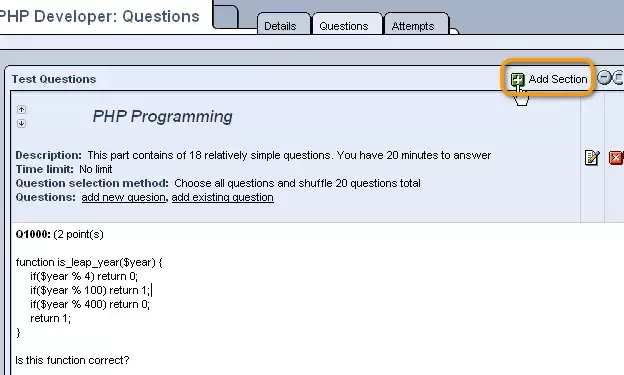
From here, click on the
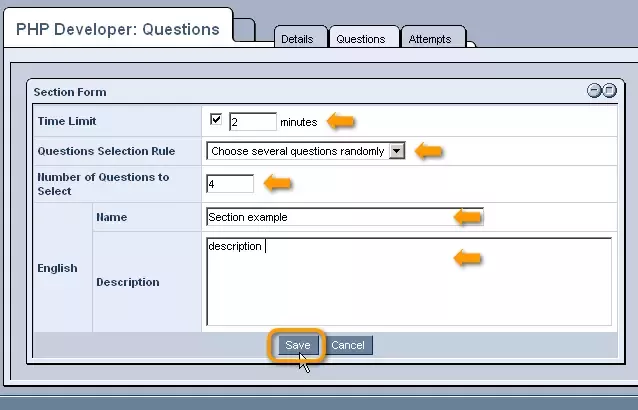
Once clicked, you will be presented with th "Section Form," which should be completed as follows: Time Limit: If you would like to set a time limit for this section, check the box and enter the maximum number of minutes that users will have in order to complete the section. Questions Selection Rule: Select the desired option from the drop-down menu in order to determine which questions will be displayed to users when taking this section of the test. Number of Questions to Select (only if "Choose Several Questions Randomly" is selected): Enter the number of questions that you would like to be randomly selected and displayed to users in this section. Name: Enter a descriptive name for this section of the test into the provided field. Description: Enter a description of the section into the provided text box. Once you are done, click "Save," and the section will be added to the test's "Questions" tab.
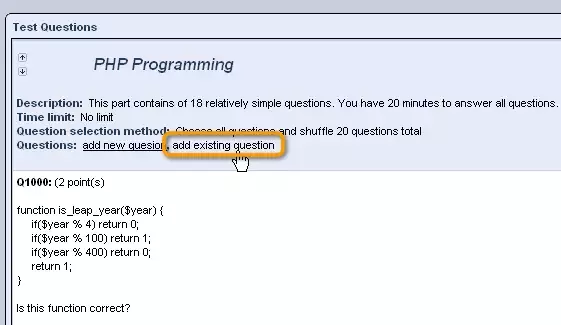
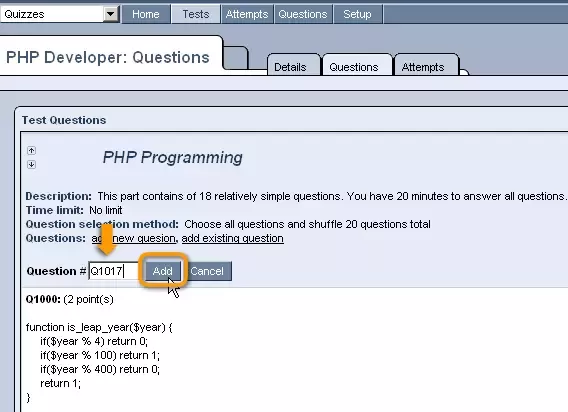
Adding Questions to a Section:In order to add questions to a section, you have two options.
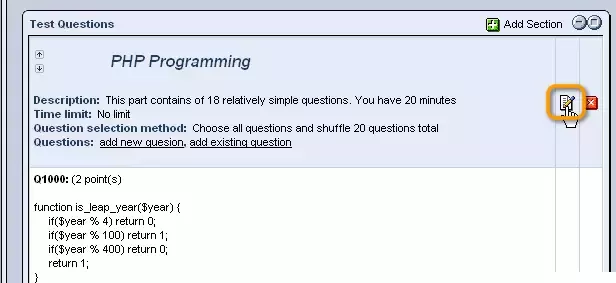
Editing Questions & Sections:Should you ever wish to edit a question or question section, simply click on the
Deleting Question & Sections:Should you ever wish to delete a question or question section, this can be done here as well, by simply clicking on the
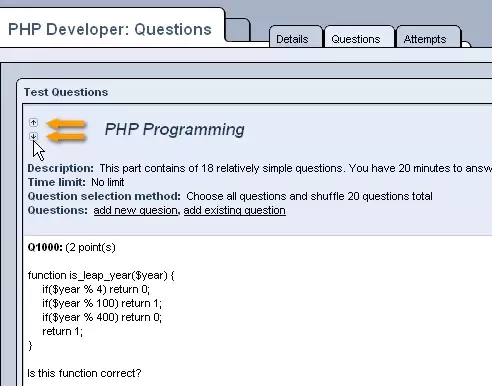
Moving Sections:Finally, in case you would like to rearrange the order in which the sections will be presented to users when taking your test, you can make use of the arrow icons on the far left side of the screen in order to move individual sections up or down within the list.
|

Aspiresoft 2017 © All Rights Reserved. Privacy Policy