Call 1-888-670-1652
Spire CoreDB Connect Error (2002) Connection timed out
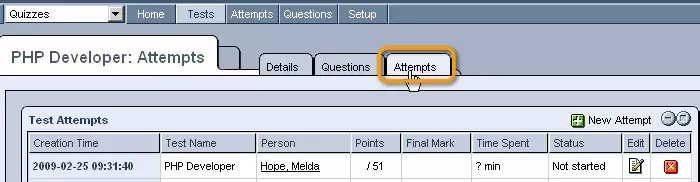
Quiz AttemptsThe "Attempts" tab allows you to view a list of all past attempts that users have taken at completing your tests.
The "Test Attempts" table displays all attempts for all existing tests, with information such as the test's name, the user's name, the score, and time spent.
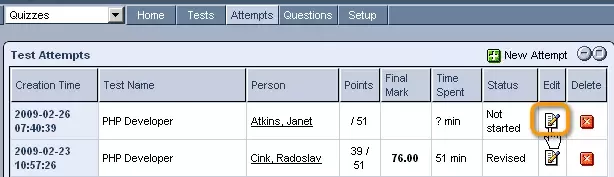
Editing Attempts:You can even modify the details of any attempt by clicking on the
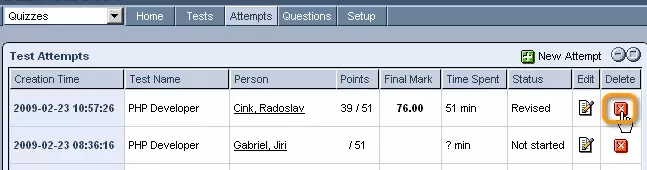
Deleting Attempts:Should you wish to delete an attempt entirely, this can be done as well, by simply clicking on the
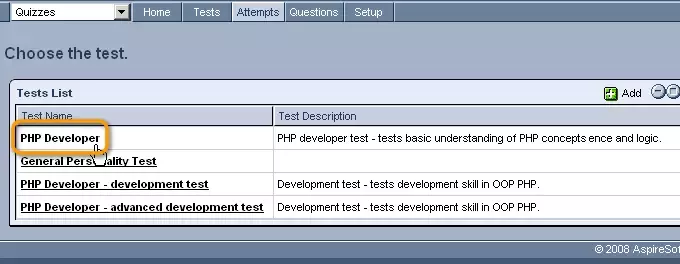
Creating New Attempts:Should you wish to add a new attempt to any of your tests, which will act as an invitation for a specified user to take the selected test, you can click on the
In the "Tests List" window that appears, simply click on the name of the test to which you would like to add an attempt.
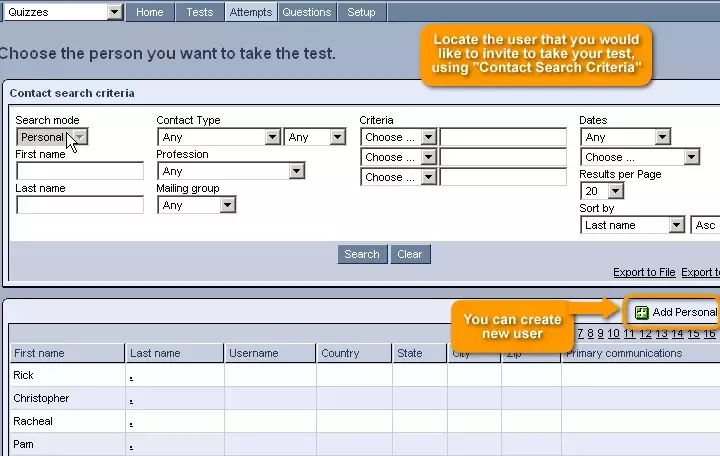
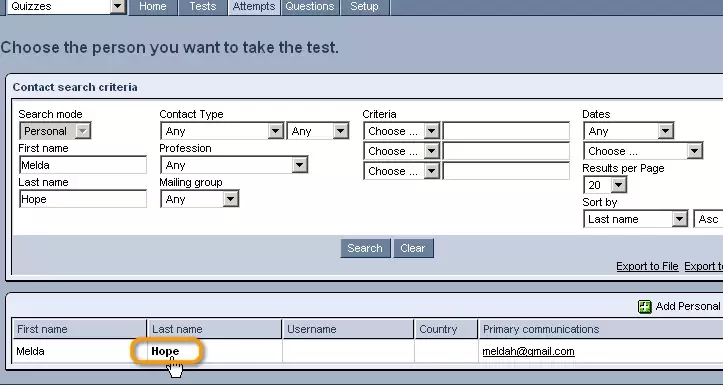
In the next window, you can use the "Contact Search Criteria" form to search through your CRM database and locate the user that you would like to invite to take your test. Should no CRM account already exist for the user, you can
create one by clicking on the
Once you have located the desired user, simply click on his/her name in order to proceed.
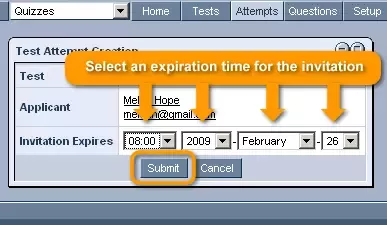
In the next window, labeled "Test Attempt Creation," you can select an expiration time for the invitation, so that the selected user will only be able to access your test until the specified date and time.
After specifying the expiration time, click "Submit" and, in the pop-up window that appears, select "OK."
You will then be presented with a link that you should copy and send to the selected user so that he/she can take your test.
As a note, if you just want to view the attempts for a specific test, you should select the "Tests" section from the top of the "Quizzes" administration screen and click on the
In the window that appears, simply click on the test's "Attempts" tab, where you can view all previous attempts as well as create new attempt invitations exactly as described above.
|


Aspiresoft 2017 © All Rights Reserved. Privacy Policy