General Project Settings
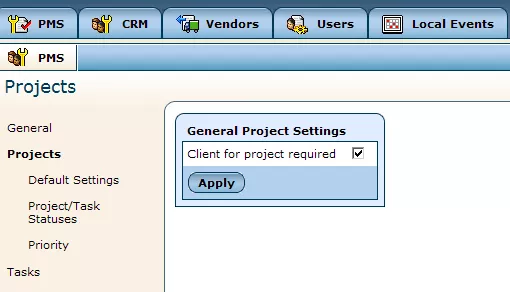
In the field that appears when you click on the "Projects" section of the "Setup," labeled "General Project Settings," you can specify whether or not you would like to require all projects to have a specified client.
If you decide to check the box labeled "Client For Project Required," every time you create a new project, you will be unable to save it until you select a client to whom it will be connected.
Default Settings
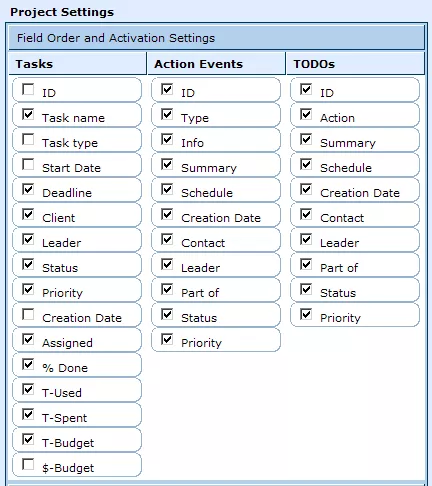
In the "Default Settings" portion of the "Projects" section, you can select the fields that will be displayed for tasks, action events (calendar items), and ToDo's which are connected to a particular project. Simply check the boxes next to the fields that you would like to be displayed for each type of item within the project's profile and click "Save."
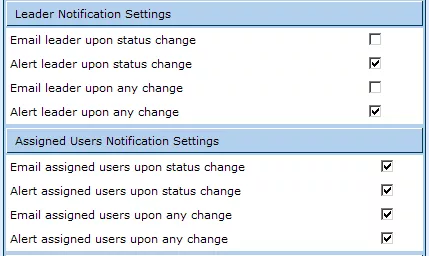
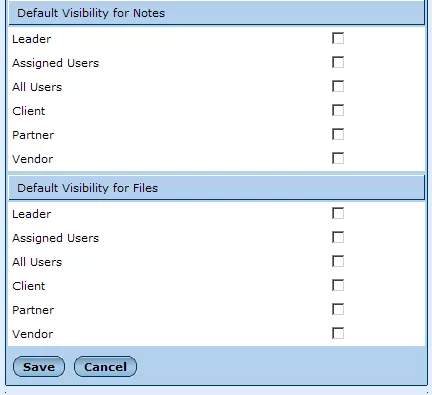
You can also set default "Leader Notification Settings," "Assigned Users Notification Settings," and "Default Visibility For Notes and Files." Unless you specify otherwise when creating individual projects, the settings specified here will be used to determine when leaders and assigned users are notified about specific changes to projects and to access to notes and files that are attached to projects' profiles.
Project/Task Statuses
This portion of the "Projects" section allows you to modify and manage the list of statuses used in creating projects and tasks.
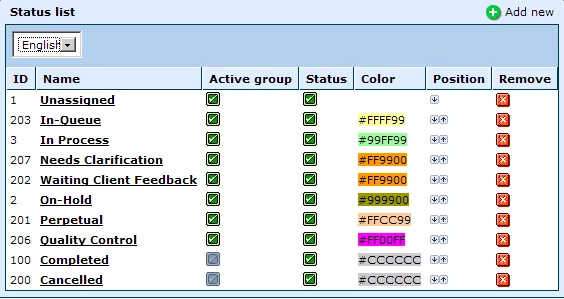
You can add a new status option to the list by clicking on the
 "Add New" icon in the upper right-hand corner of the "Status List" window.
When presented with the status creation form, simply fill out the fields as follows:
Name: Enter a unique name for the new status.
Active Group: Check this box if you would like the new status to be used to describe active tasks and projects (an example of an
inactive group status would be "Completed").
Status: Check this box if you would like the new status option to be available right away and appear in the "Status" drop-down menu for tasks and projects.
Color: Select a color that you would like all tasks and projects with this status to be highlighted in.
Once you have completed the fields, click "Save" and the new status will be added to the system.
In addition to creating new status options, you can easily change the settings for each existing status by clicking on the status's name within the list and altering its details as desired.
Should you wish to change the order in which the status options are displayed in their drop-down menu, simply use the arrow icons in the "Position" column to move individual options up or down within the list as desired.
And should you decide to remove a status option from the list entirely, this can be done here as well, by simply clicking on the
 "Remove" icon within the desired option's row.
Priority
This portion allows you to modify and manage the list of priorities used in creating projects and tasks.
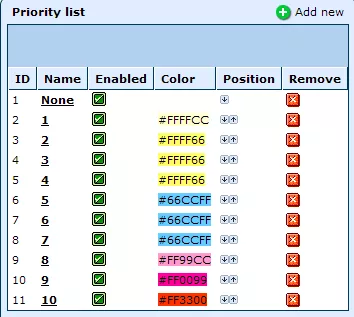
Within the window labeled "Priority List," you will a list of the different priority options available for tasks and projects.
You can modify the settings for each priority by simply clicking on the desired option's name.
Once you have selected the desired option to modify, you can changes its name, make it inactive by unchecking the "Enabled" box (so that it will not appear in the list of available priority options when creating tasks and projects), and pick a color for tasks and projects with that particular priority to be highlighted in.
You can also change the order in which the priority options are displayed within their drop-down menu by using the arrow icons in the "Position" column to move individual options up or down within the list.
And should you decide to remove a particular priority from the list entirely, this can be done as well, by simply clicking on the
"Remove" icon located in the desired priority's row.
In addition to modifying existing priority options, you can add new priorities to the list by clicking on the
"Add New" icon located in the upper right-hand corner of the "Priority List" window.
Simply enter a name for the new priority, check the "Enabled" box if you would like the priority to become available and appear in the "Priority" drop-down menu for projects and tasks, and select a color that you would like to be used to highlight projects and tasks with this specific priority.
Once you have completed the fields, click "Save" and the new priority will be added to the system.