Call 1-888-670-1652
Spire CoreDB Connect Error (2002) Connection timed out
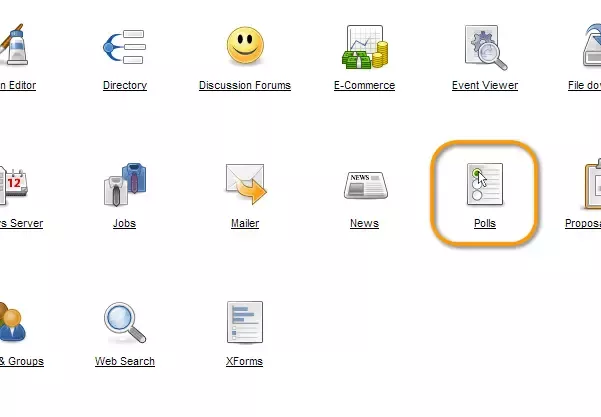
Creating PollsIn order to begin creating your own personalized polls, the first step is to access the "Polls" administration. Simply login to your website's administration and, from the homepage, click on the "Polls" icon.
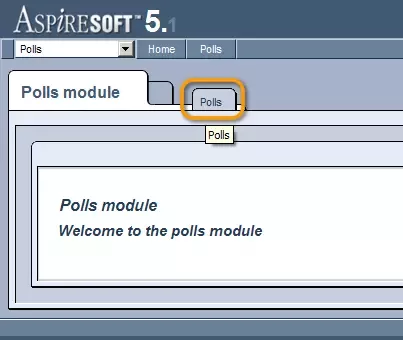
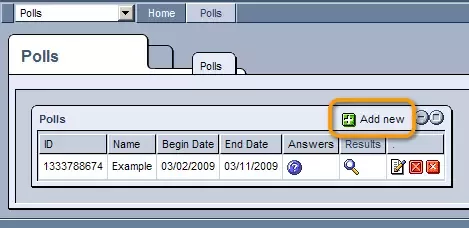
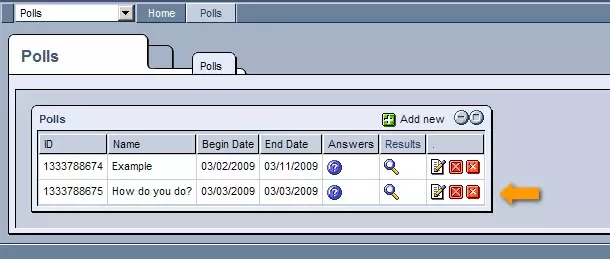
Once inside, click on the tab labeled "Polls," which will bring you to a table where you can view all existing polls.
To create a new poll, simply click on the
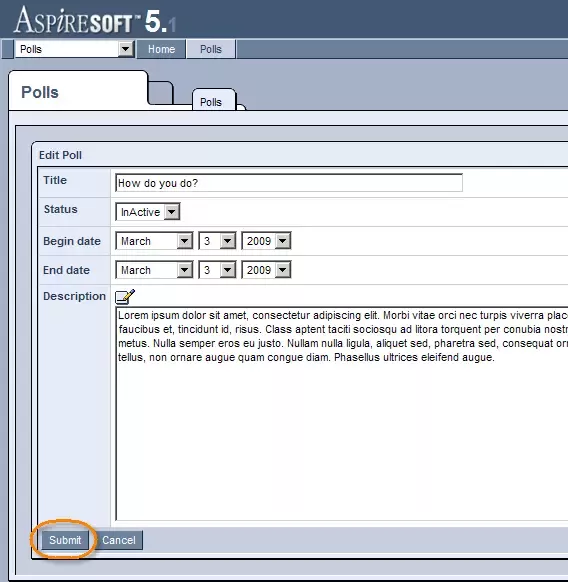
Once clicked, you will be presented with the "New Poll" form, which should be completed as follows: Title: Enter a descriptive title for your poll into the provided field. Status: If you would like to make the poll available for users to complete, select "Active" from the drop-down menu. Otherwise, leave it as "InActive." Begin Date: Use the drop-down menus to specify the date on which you would like the poll to begin functioning and tracking users' responses. End Date: Use the drop-down menus to specify the date on which you would like the poll to stop functioning and tracking users' responses. Description: Enter a description of the poll and its purpose in the provided text box. Once the form has been completed to your liking, click "Submit" at the bottom of the screen.
After clicking "Submit," you will be returned to the "Polls" table, where you should see a new entry for the poll you have just created.
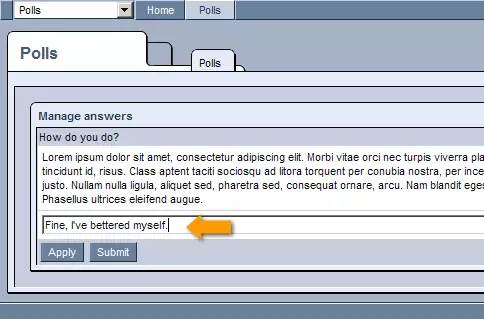
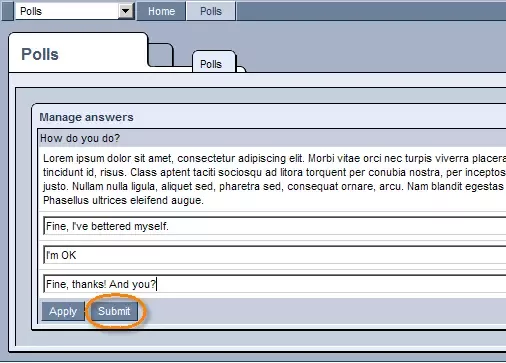
The next step is to specify the options that will appear in your poll, and can be done by clicking on the
In the window that appears, simply type the first answer option into the provided empty line just as you would like it to appear in the poll.
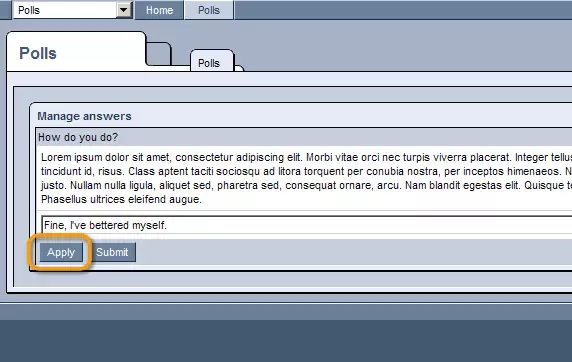
In order to move on and create another answer option, click on the "Apply" button.
This will generate an additional empty line at the bottom of the window in which you can enter the next answer option that you would like to appear in the poll.
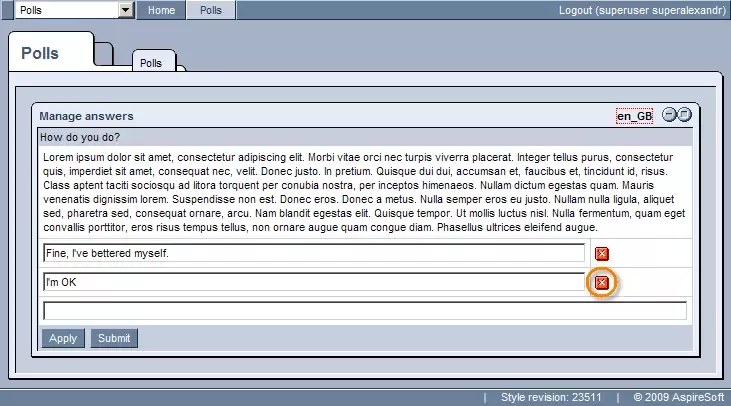
Feel free to create as many answer options as you wish, following the same procedure as described above. Should you ever wish to delete one of the options, this can be done by simply clicking on the
Once you have entered the final answer option, simply click "Submit" at the bottom of the window, and you will be returned to the "Polls" table.
Once you have finished specifying the desired answer options, your poll is ready to go. For information on how to proceed once you have completed your poll, please see the following sections: |


Aspiresoft 2017 © All Rights Reserved. Privacy Policy