Call 1-888-670-1652
Spire CoreDB Connect Error (2002) Connection timed out
Modifying VendorsIn order to modify the information stored within the CRM on a particular vendor, you must first
locate the vendor's profile.
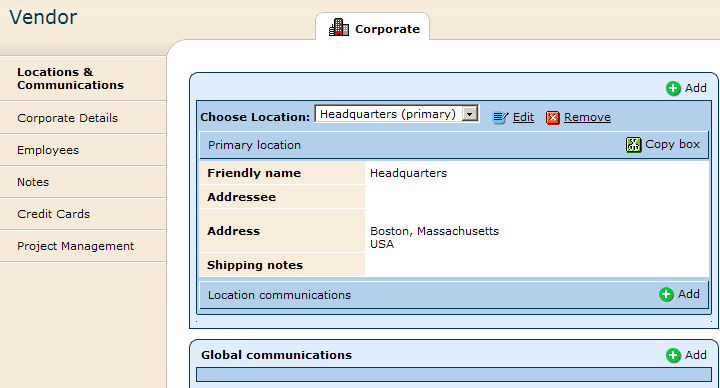
Locations & CommunicationsLocation: If you would like to add a new location to the company's profile, click on the
Simply enter the new location's details into the provided fields and click "Save."
When creating entries within the "Location" section, you may notice a check-box labeled "Primary." You can feel free to enter as many different entries as you would like, but the one marked as "Primary" will be the one displayed on the vendor's page by default. Should you wish to modify this location, or any other existing location, simply select it from the drop-down menu labeled "Choose Location" and click on the
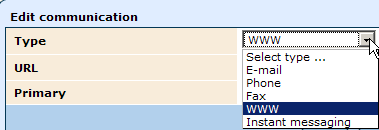
Global Communications: In order to add an entry into the "Global Communications" section, just click on the
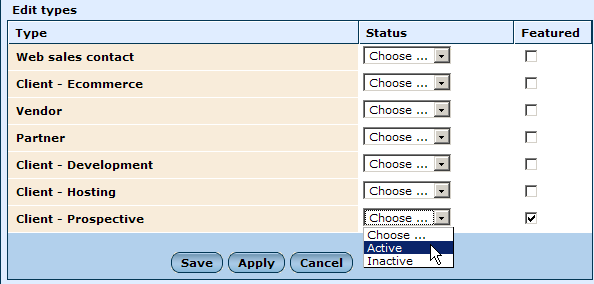
Corporate DetailsIn this tab, you will see 4 sections: Contact Types, Corporate Details, Corporate Datasheet, and Marketing Data. Contact Types: When adding the vendor to the CRM, you most likely already set a contact type. Should you wish to change it, however, just click on the
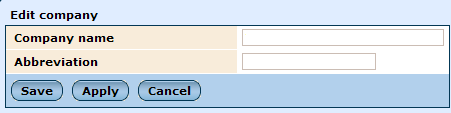
This section allows you to make changes to the company's nominal details. Simply enter the vendor's name and/or abbreviation as desired and click "Save."
In order to enter more specific information about a vendor, click on the
One field of particular interest may be the one labeled as "Industries." Here you will be able to view a tree of industries, which can be modified in the CRM administration to meet your particular needs. If you would like to specify an industry for the vendor, click on the "+" icon next to the appropriate folder and it will expand, allowing you to select a more specific industry classification by checking the box next to the desired option. Once you have finished entering the relevant data, just click on "Save," and the vendor's profile will be updated.
With this field, you can specify the source through which the vendor in question was brought into contact with your business. Simply select the appropriate source from the drop-down menu, and the information collected can be used in the future to ensure more efficient and successful marketing.
EmployeesThis section allows you to view and modify a complete list of the vendor company's employees. In order to add a new employee, simply click on the
For more information on how to complete the specific fields, please see our section on adding contacts. Should you wish to remove a particular contact from the list of employees, simply check the box located at the far right of that employee's row and click on the "Remove Selected" button located in the lower right-hand corner of the table. NotesThis section allows you to add relevant information, in the form of notes, to a vendor's CRM profile. In order to add a new note, click on the
If you would like to modify an existing note, this can be done here as well, by clicking on the
Should existing notes ever become irrelevant, redundant, or incorrect, there is also the option of removing notes from a vendor's profile. Just click on the
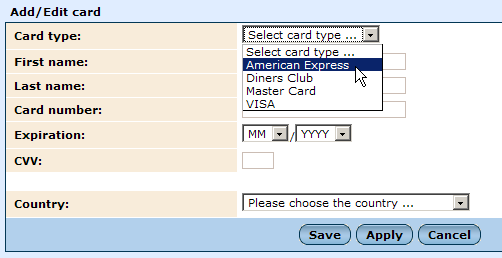
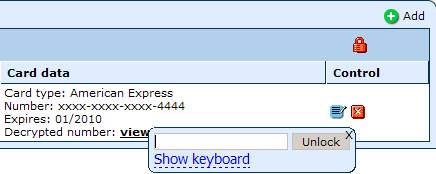
Credit CardsThis section allows you to store a vendor's credit card information with the secure storage system. In order to add a new credit card entry to the vendor's profile, click on the "Add" icon located in the upper right-hand corner and fill out the provided form with the credit card's information.
Should you wish to modify existing credit card information, click on the
As a note though, when editing existing credit card entries, you will not be able to view the entire credit card number, as everything except for the last four digits will be encrypted for security purposes. In order to view a credit card's full number, you must click on the "View" link in that credit card's row of the table. You will then be prompted by a pop-up window, where you can enter the password provided to you by our system administrator and click "Unlock."
Vendor DetailsHere, you can modify further specific information about the vendor, entered upon the vendor's initial addition to the CRM. Simply specify whether you are still cooperating with the vendor by checking or unchecking the box labeled "Active," and update the "Rating" and "Commission Rate" fields as desired. You can also modify the vendor's specified industry, expanding the broader categories within the tree by clicking on the "+" icon located to their left, and checking the box next to the desired industry. Project ManagementConsolidated in one convenient location, the "Project Management" section allows you to view lists of all projects, tasks, calendar items, and ToDo's connected to a particular vendor. You can also add new projects, tasks, calendar items, and ToDo's related to the vendor by clicking on the
|
 "Add" icon in the top right-hand corner of the tab.
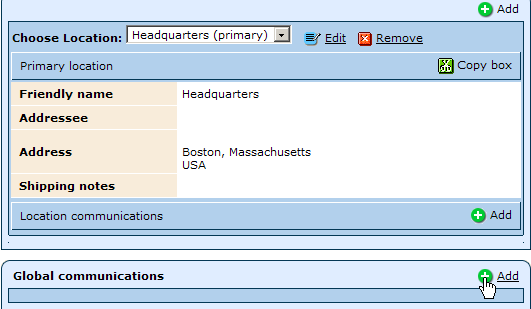
 "Edit" icon. Then, in the provided form, modify the information as desired and click "Save."
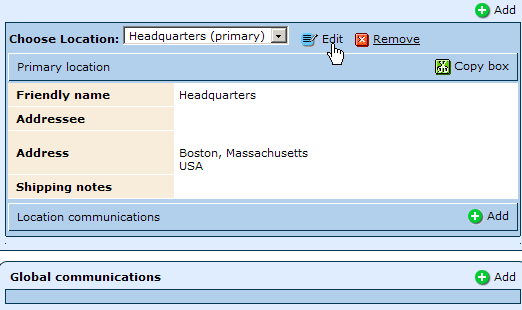


Aspiresoft 2017 © All Rights Reserved. Privacy Policy