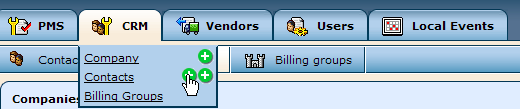
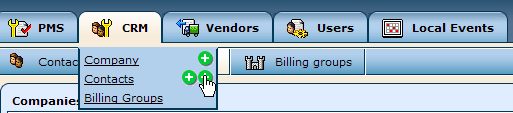
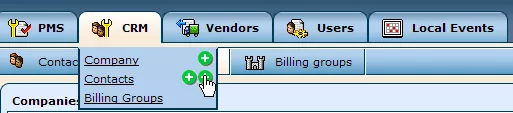
In order to add a contact into the CRM, hold your cursor over the "CRM" tab and click on one of the
 "Add" icons next to the "Contacts" label (the one on the left is for
personal contacts and the one on the right is for
employees).
"Add" icons next to the "Contacts" label (the one on the left is for
personal contacts and the one on the right is for
employees).
In either case, you will be presented with a detailed form to fill out with the contact's information, the process for which is quite similar for both types of contacts.
After clicking on the left-hand
 "Add" icon, you will have the opportunity to complete the following fields:
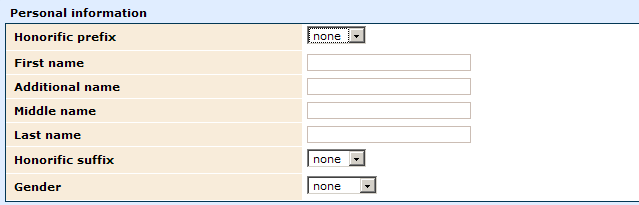
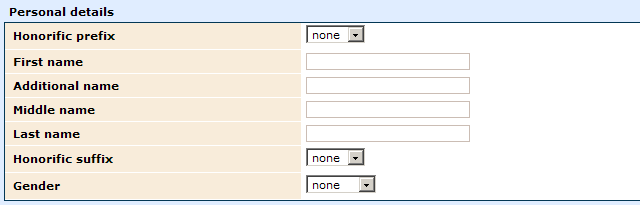
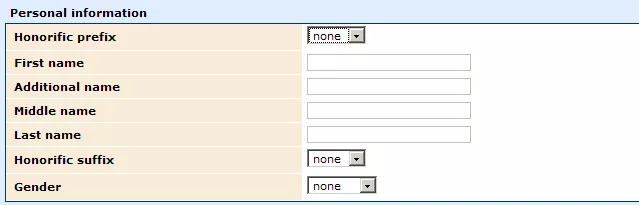
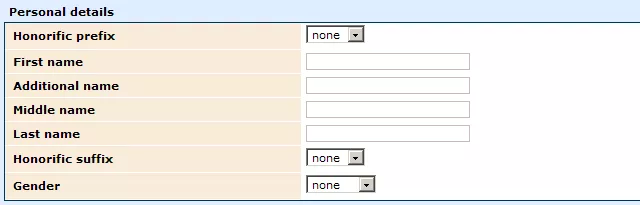
Personal Information:
In this section, you can store a contact's full name, as well as specify his/her gender and select appropriate prefixes and suffixes, in order to ensure proper correspondence with the contact in the future.
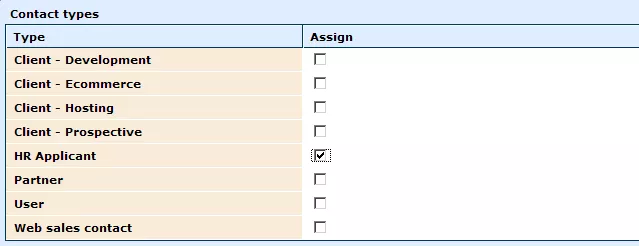
Contact Types:
Here, you can check the box(es) representing the contact's type in order to make it easier to search for and locate the contact in the future. This classification can also help you to locate other related contacts, by searching for and viewing a list of all contacts of the same type.
Mailing Groups:
Check the box(es) next to the particular mailing group(s) you would like the contact to be included in, should you wish them to receive, for example, promotions or news about your business.

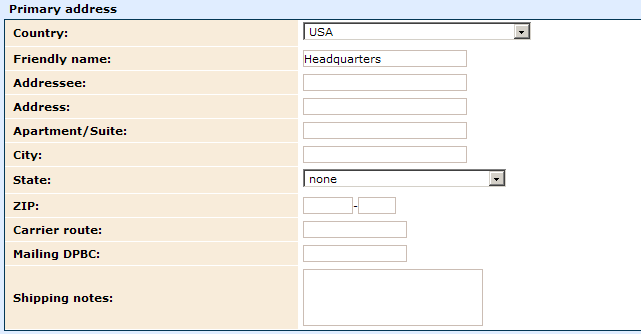
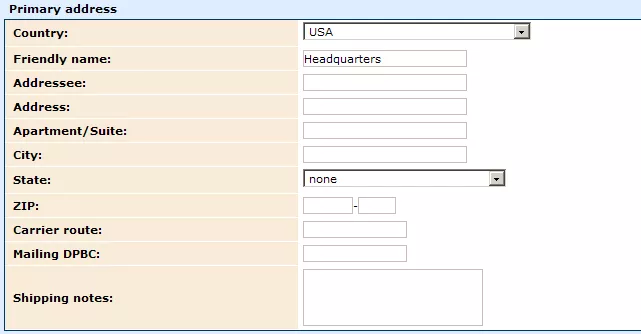
Primary Address:
This section allows you to enter detailed information on the contact's primary address, which will be used as the default means of correspondence with the contact. You can even specify a "Friendly Name" for this address to be stored under, ensuring easy access and distinction, should you choose to enter secondary addresses (which can be done after the contact has already been added to the CRM, as described in the
"Modifying Contacts" section).
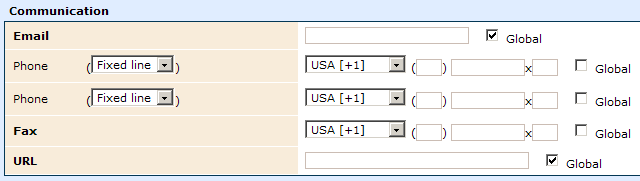
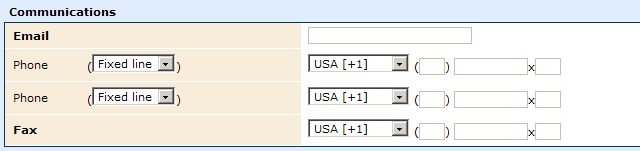
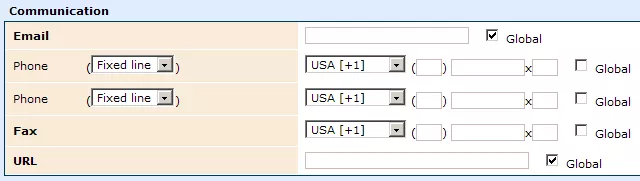
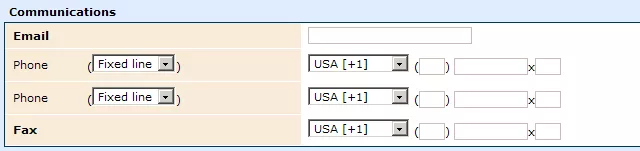
Communication:
In this section, you can enter numerous ways in which to contact the contact that you are adding to the CRM.
When entering telephone numbers, the following process should be followed. First, specify whether the number refers to a fixed land-line or a mobile phone, by selecting the appropriate option from the left-most drop-down menu. Then, from the next drop-down menu, select the desired country code. Within the next field, enter the area code (for mobile phones this is just the first 3 digits that follow the country code). After this, you can enter the rest of the phone number (the last window is
for extensions).
The "Global" check-boxes next to the each field can be selected if you wish to specify a particular entry as a primary means of communication.
In case you would like to edit this information and/or include further contact information, please see the section on
"Modifying Contacts."
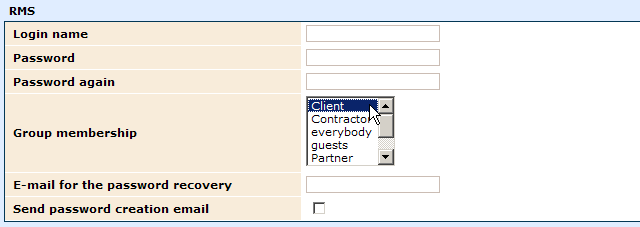
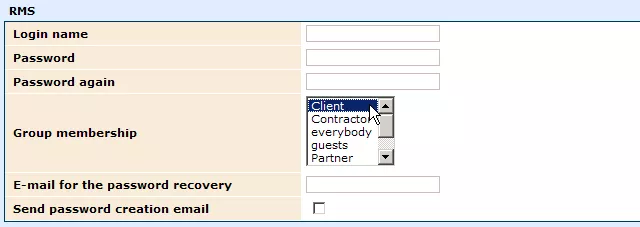
RMS:
If you would like the contact to be able to access the Project Management system, you must first create RMS details for him/her within this section.
Simply enter a unique login name and password, select the group(s) you would like the contact to be a member of in order to set his/her access rights to different features of the system, and enter the contact's email address for password recovery.
Also, should you prefer for the contact to determine his/her own password, rather than assigning one yourself, check the box labeled "Send Password Creation Email."
Billing Group:
In this field, you can select a billing group for the contact from the drop-down menu. You will have the option of creating a new billing group just for the contact (by selecting "Self") or of choosing one of the billing groups that already exists within the system.

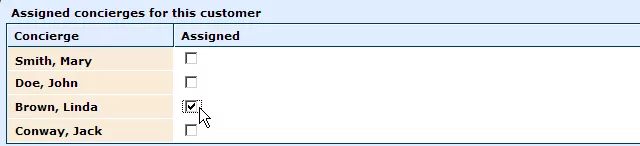
Assigned Concierges For This Customer:
Within this field, you can assign concierges, who will generally be responsible for all dealings with this particular contact, by selecting the desired employees from the provided list.
Once you have finished entering the contact's information into the relevant fields, click "Save," and the contact will promptly be added to the CRM.
Note: The names of fields, the fields themselves, and the specific options available within the fields can all be modified by our administrators to meet your particular needs as best as possible.
The process for adding contacts as employees of specific companies is quite similar to that of adding personal contacts. The only major difference is that you will have to specify the company for which the contact works.
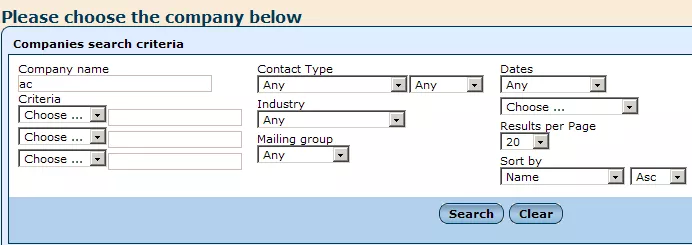
The first step, after clicking on the right-hand
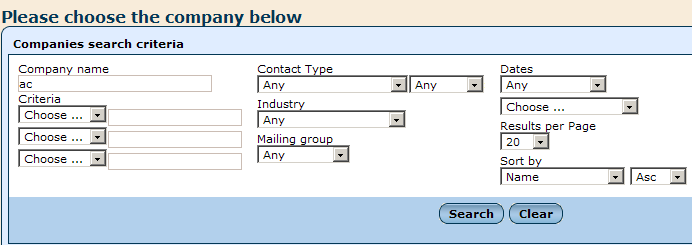
"Add" icon (as displayed above), is to select the desired company. Use the provided search form to enter information about the sought-after company, and click "Search." Then, from the results list that appears, select the company of which the contact is an employee.
Should the contact's company not already be entered into the CRM, you will have to create a profile for it, which can be done by clicking on the
"Add" icon located below the search form. For more detailed instructions on how to add a company to the CRM, please see our section on
"Adding Companies."
Once you have selected the company that you would like to specify as the contact's employer, you will be presented with a form similar to the one used in adding personal contacts, with numerous fields to fill in with the contact's details.
Personal Details:
In this section, you can store a contact's full name, as well as specify his/her gender and select appropriate prefixes and suffixes, in order to ensure proper correspondence with the contact in the future.
Employee Details:
Here, you can specify the employee's title by selecting the appropriate option from the drop-down menu. You can also specify the particular office at which the contact works, by selecting the appropriate location from the "Office" drop-down menu. If desired, the contact can also be specified as a web contact by clicking in the appropriate check-box.

Contact Types:
Here, you can check the box(es) representing the contact's type in order to make it easier to search for and locate the contact in the future. This classification can also help you to locate other related contacts, by allowing you to search for and view a list of all contacts of the same type.

Mailing Groups:
Check the box(es) next to the particular mailing group(s) you would like the contact to be included in, should you wish them to receive, for example, promotions or news about your business.
Communication:
In this section, you can enter numerous ways in which to contact the contact that you are adding to the CRM.
When entering telephone numbers, the following process should be followed. First, specify whether the number refers to a fixed land-line or a mobile phone, by selecting the appropriate option from the left-most drop-down menu. Then, from the next drop-down menu, select the desired country code. Within the next field, enter the area code (for mobile phones this is just the first 3 digits that follow the country code). After this, you can enter the rest of the phone number (the last window is
for extensions).
In case you would like to edit this information and/or include further contact information, please see the section on
"Modifying Contacts."
RMS:
If you would like the contact to be able to access the Project Management system, you must first create RMS details for him/her within this section.
Simply enter a unique login name and password, select the group(s) you would like the contact to be a member of in order to set his/her access rights to different features of the system, and enter the contact's email address for password recovery.
Also, should you prefer for the contact to determine his/her own password, rather than assigning one yourself, check the box labeled "Send Password Creation Email."
Once you have finished filling out the form with the contact's information, click "Save," and the contact will be added to the CRM as an employee of the specified company.