Call 1-888-670-1652
Spire CoreDB Connect Error (2002) Connection timed out
RMS SetupIn the "RMS" section of the "Setup," you can assign and manage access rights for using each of the many features of the PMS.
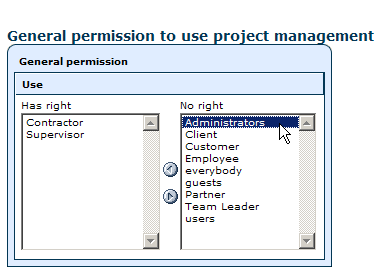
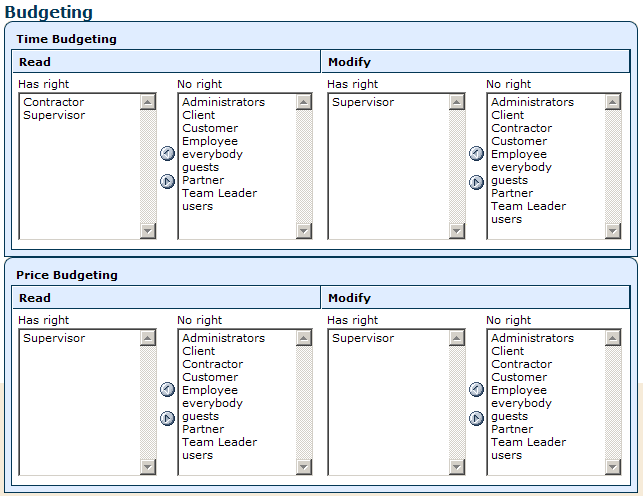
General Permission To Use Project ManagementIn this field, you can select which groups you would like to be able to use the Project Management module. Simply move the groups you would like to grant access rights to into the left-hand "Has Right" column and ensure that those groups whose members you do not want to have access to the module are located in the right-hand "No Right" column. In order to move groups between columns, you can use the small arrow icons located between the columns or simply double-click on the desired group's name.
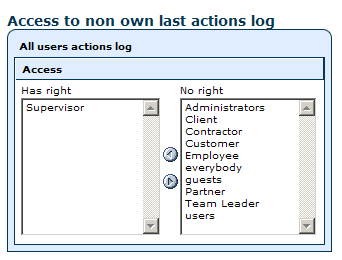
Access To All Users' Last Actions LogsIn this field, you can grant certain groups access to the last actions logs of all users within the system. By moving a group into the left-hand "Has Right" column, its members will be able to see all other users' last action logs by going to "Users/List" and clicking on the log icon next to the desired user.
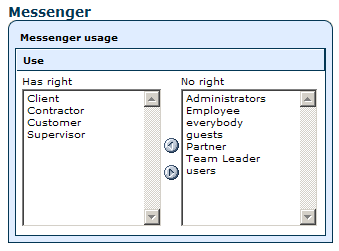
Messenger UsageThis field allows you to select the groups whose members you would like to be able to use the system's messenger. In order to grant access, simply move the desired groups into the left-hand "Has Right" column using the provided arrow icons or double-clicking on the desired groups' names.
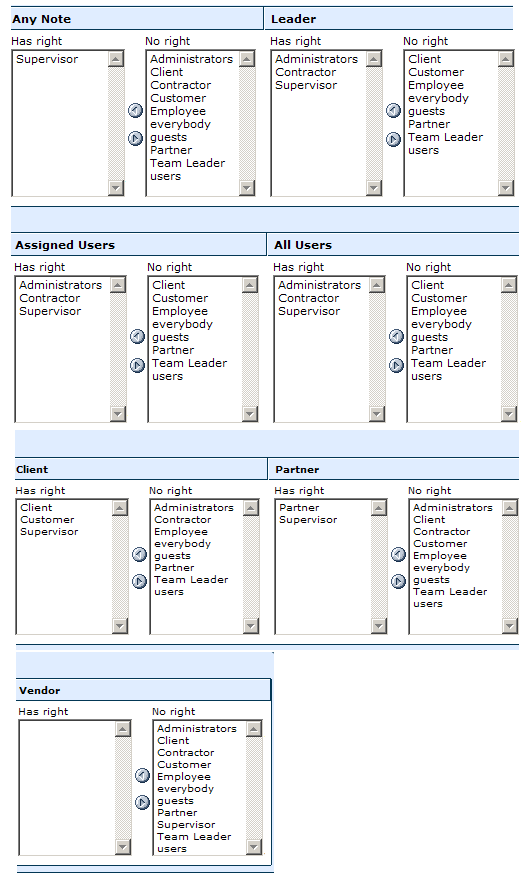
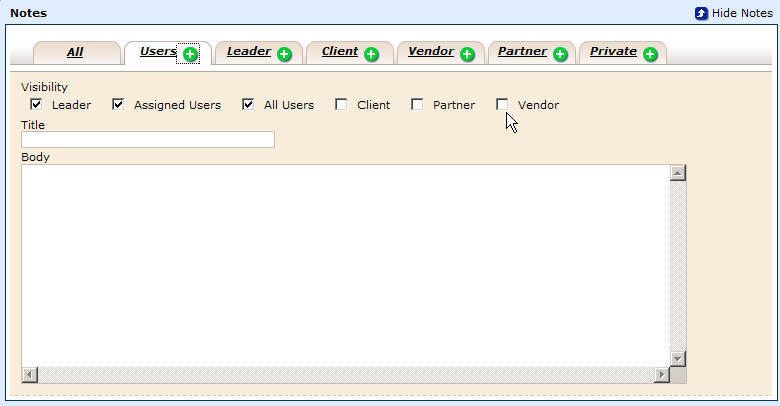
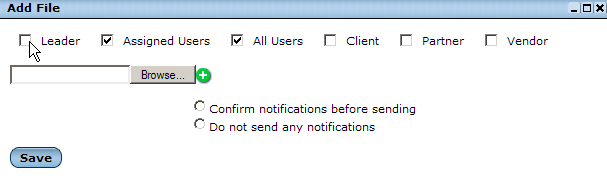
Notes and FilesHere, you can determine which groups will be able to view notes and files when specific visibility options are assigned to them. For each visibility option, select the groups that you would like to be able to view the notes or files, and move them into the "Has Right" column. When you are finished, click "Submit Changes" and the new visibility settings will be applied.
To use an example from the image above, if, when creating a note, you select "Leader" within the "Visibility" section of the form displayed below, only users belonging to the "Administrators," "Supervisors," or "Contractors" groups will be able to see the note.
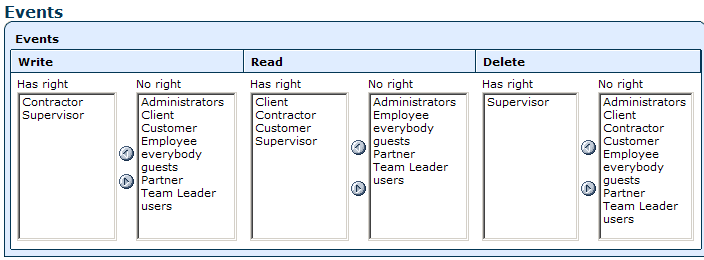
Local EventsThis field allows you to specify individual rights for writing, reading, and deleting local events. In each of the three sections, simply select the groups that you would like to be able to perform that specific action and move them into the left-hand "Has Right" column. When you are done, click "Submit Changes" and the settings will be applied to the system.
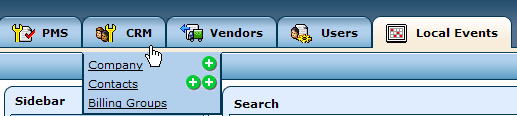
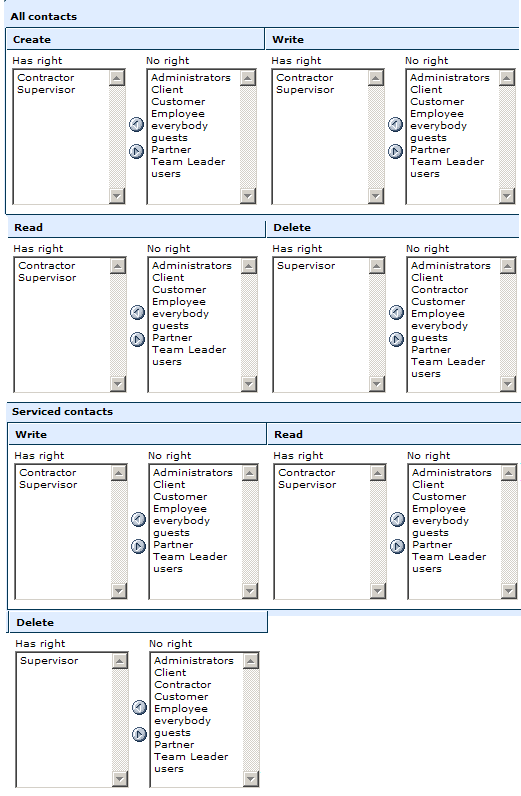
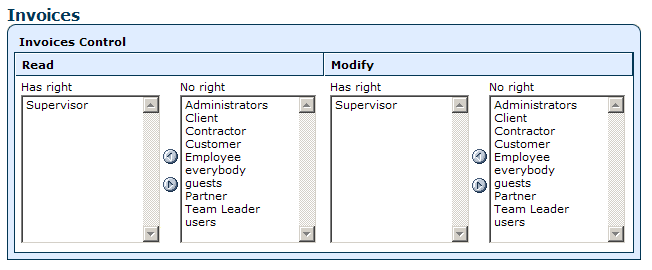
ContactsIn this section, you can set rights for individual actions within the CRM system such as adding new contacts or companies, editing contacts' information, viewing contacts' information, and deleting contacts from the system. In order to grant users the right to add contacts to the CRM, simply move the desired groups into the left-hand "Has Right" column within the "Create" section of the form. The same can be done within the "Write" section in order to give users the right to edit contacts' information, within the "Read" section in order to give users the right to view contacts' information, and within the "Delete" section in order to give users the right to remove contacts from the system. Separate rights can be set for all contacts and those specifically classified as serviced contacts.
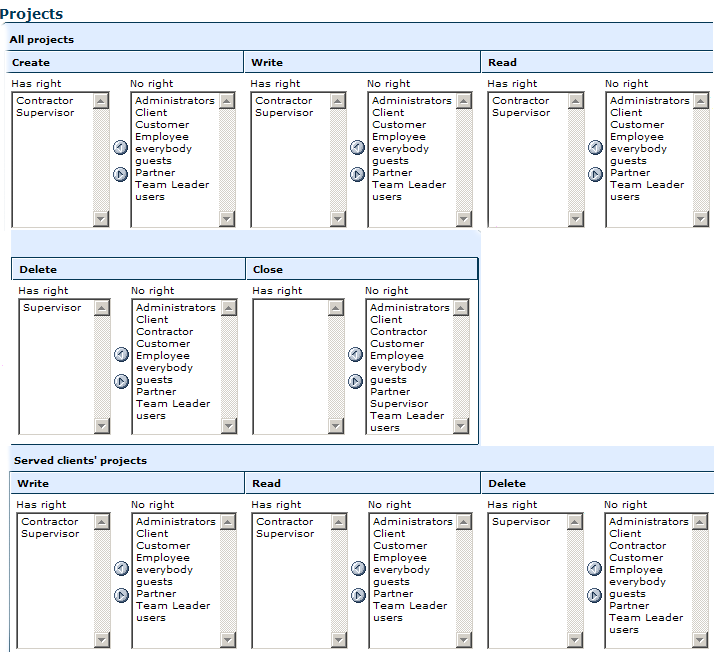
ProjectsHere, you can specify individual rights for creating, editing, viewing, deleting, and closing projects. In order to specify which users you would like to be able to create projects, select the desired groups and move them into the left-hand "Has Right" column within the "Create" section of the form. The same can be done within the "Write" section in order to grant users the right to edit project details, within the "Read" section in order to grant users the right to view projects, within the "Delete" section in order to grant users the right to delete projects from the system, and within the "Close" section in order to grant users the right to conclude projects. Different access rights can be set separately for all projects and those specifically classified as served clients' projects.
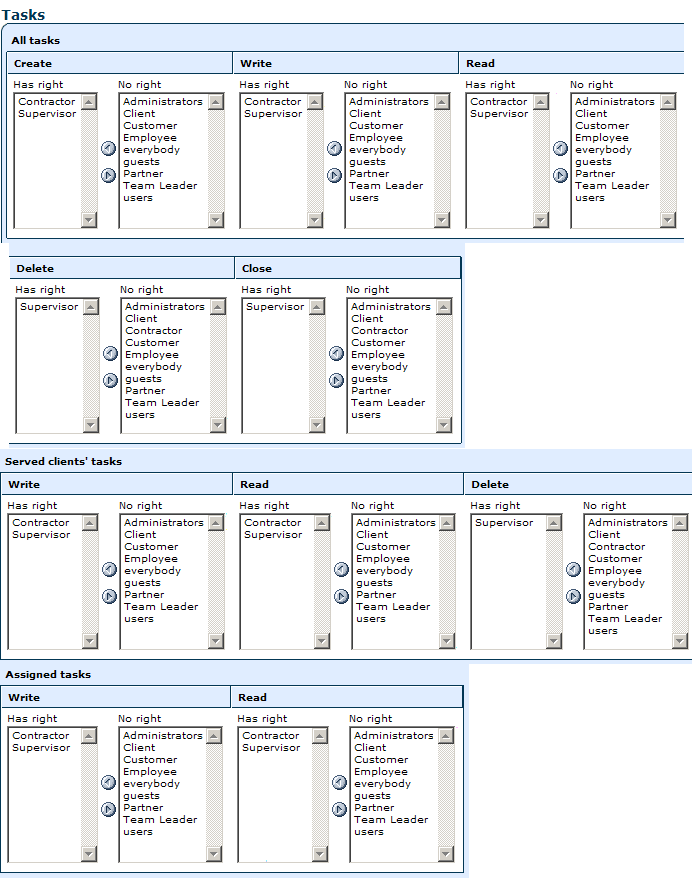
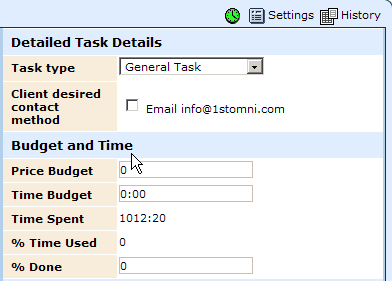
TasksIn this section, you can set individual rights for creating, editing, viewing, deleting, and closing tasks. In order to specify which users you would like to be able to create tasks, select the desired groups and move them into the left-hand "Has Right" column within the "Create" section of the form. The same can be done within the "Write" section in order to grant users the right to edit task details, within the "Read" section in order to grant users the right to view tasks, within the "Delete" section in order to grant users the right to delete tasks from the system, and within the "Close" section in order to grant users the right to conclude tasks. Different access rights can be set separately for all tasks and those specifically classified as served clients' tasks.
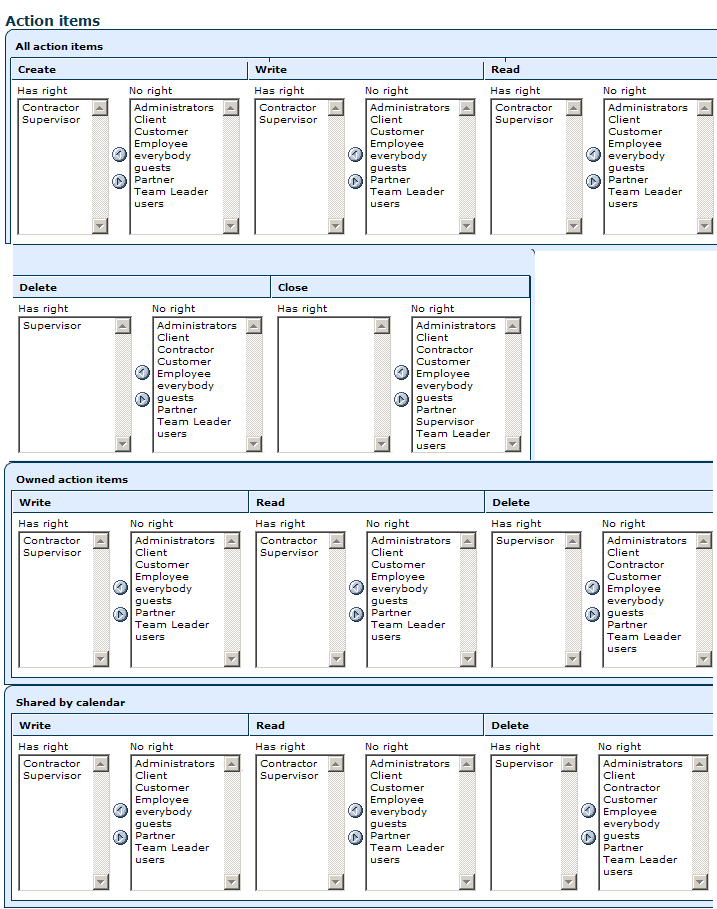
Action Items & ToDo'sThis section allows you to set individual rights for creating, editing, viewing, deleting, and closing calendar items and ToDo's. In order to specify which users you would like to be able to create calendar items and ToDo's, select the desired groups and move them into the left-hand "Has Right" column within the "Create" section of the form. The same can be done within the "Write" section in order to grant users the right to edit item details, within the "Read" section in order to grant users the right to view items, within the "Delete" section in order to grant users the right to delete items from the system, and within the "Close" section in order to grant users the right to conclude items. Different access rights can be set separately for all items, those specifically classified as "owned action items," and those classified as "shared by calendar."
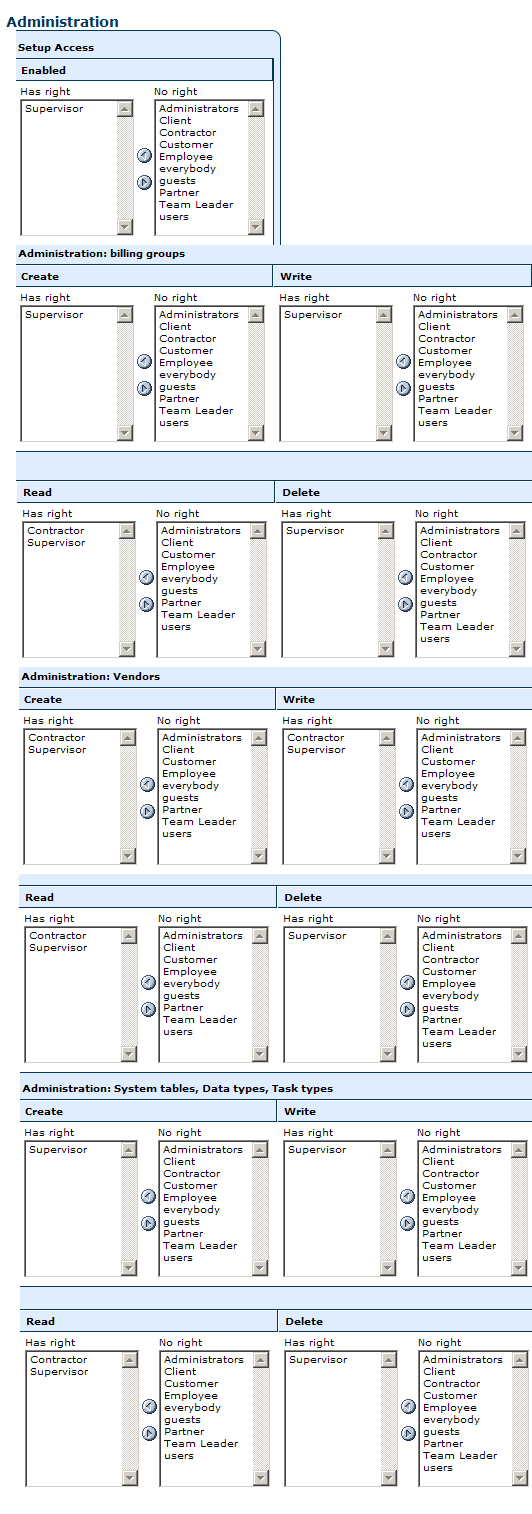
AdministrationIn this section, you can set individual rights for accessing the PMS Setup in general and administering specific features such as billing groups, vendors, system tables, data types, and task types. In order to grant users rights to each of the specific functions, simply move the desired groups into the left-hand "Has Right" column within that function's section of the form. Those granted access to the PMS administration will then be able to see the "Setup" icon (pictured below) on their screens when logged into the PM module, which can be clicked on in order to modify the system settings as desired. |


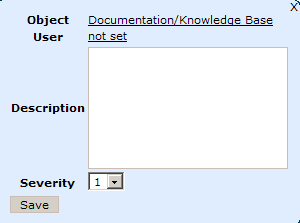
 "Add" icon and filling out the description and quality severity rating as desired.
Aspiresoft 2017 © All Rights Reserved. Privacy Policy