Call 1-888-670-1652
Spire CoreDB Connect Error (2002) Connection timed out
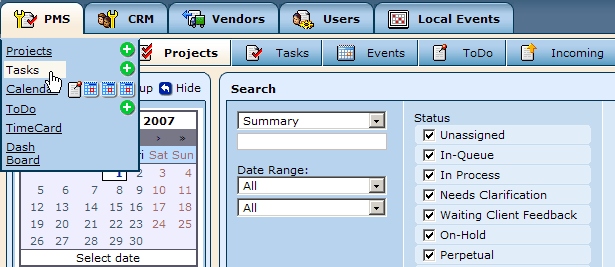
Modifying TasksLocating Existing Tasks:In order to modify an existing task, simply access the "Tasks" section of the "PMS" tab.
Here you will find a list of all of the ongoing tasks, as well as a "Search" table at the top of the screen, which allows you to limit the list by entering information about the particular task you are looking for, so that you do not have to scroll through the entire list of tasks. Once you have located the desired task, simply click on its name within the "Tasks List" and you will be taken to a screen where you can edit all of its details. Modifying Task Details:In order to modify the existing information, simply delete any undesirable entries and insert new information where appropriate, in the same way, and in the same fields, as when initially creating the task. In case you wish to include more detailed information on the task than can be accommodated by these fields, you will have the option here of including notes. Notes:The "Notes" section can be found below the "Task Details" window.
Adding New Notes:In order to add a new note to the task, simply click on the
Once selected, you will be presented with a pop-up window labeled "Add New Note."
Within this window, enter an appropriate name into the "Title" field, and fill out the "Body" of the note with the desired information. When done, click on the "Save" button. Notifications:With notes, you also have the option of sending notifications to the users they are meant for (in which cases the users will be alerted by a pop-up window, when logged into the Project Management site, that a new note has been created for them). By default, notifications will be sent to all users specified within the "Visibility" field at the top of the window. If, however, you would like notifications to be sent only to certain users, or you would rather no notifications be sent at all, you can select either of the following two options found at the bottom of the window:
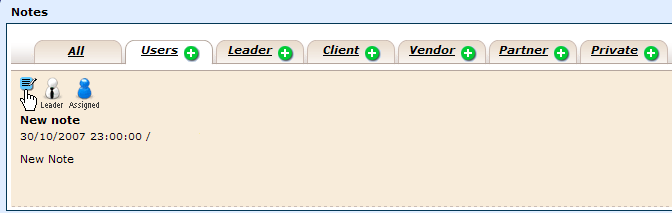
Editing Notes:In order to edit an existing note, locate it within the related task's "Notes" field and click on the blue "Edit" icon located in the upper left-hand corner. You will then be presented with the same window as used in the note's initial creation, where you can modify the visibility, title, and body, as well as specify notification settings. When you are done making your alterations, simply click on the "Save" button in order to apply your changes for all authorized users to view, or on the "Cancel" button in order to discard your changes and revert back to the original note.
Adding Files:The "Tasks" feature of the "PMS" tab also allows you to upload and attach files to task, so that users working on a task can easily access useful documents and/or images. In order to attach a relevant file, locate the "Attached Files" field below the desired task's "Details" and "Notes" sections. Within this field, simply click on the
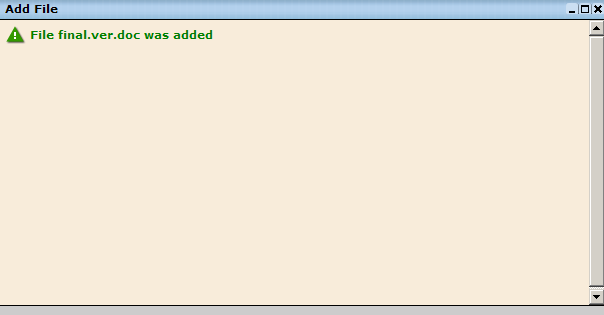
Once you have selected the desired file, specify a suitable notification option and click on "Save." You will then be presented with a window confirming that your file has, in fact, been uploaded to the desired task's profile.
|

 "Add" icon next to the name of the group whose members you would like to view the note.
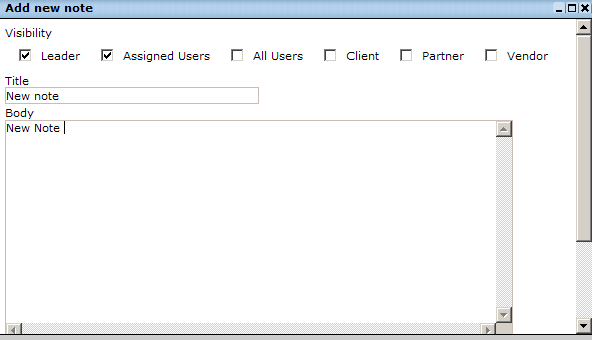

Aspiresoft 2017 © All Rights Reserved. Privacy Policy